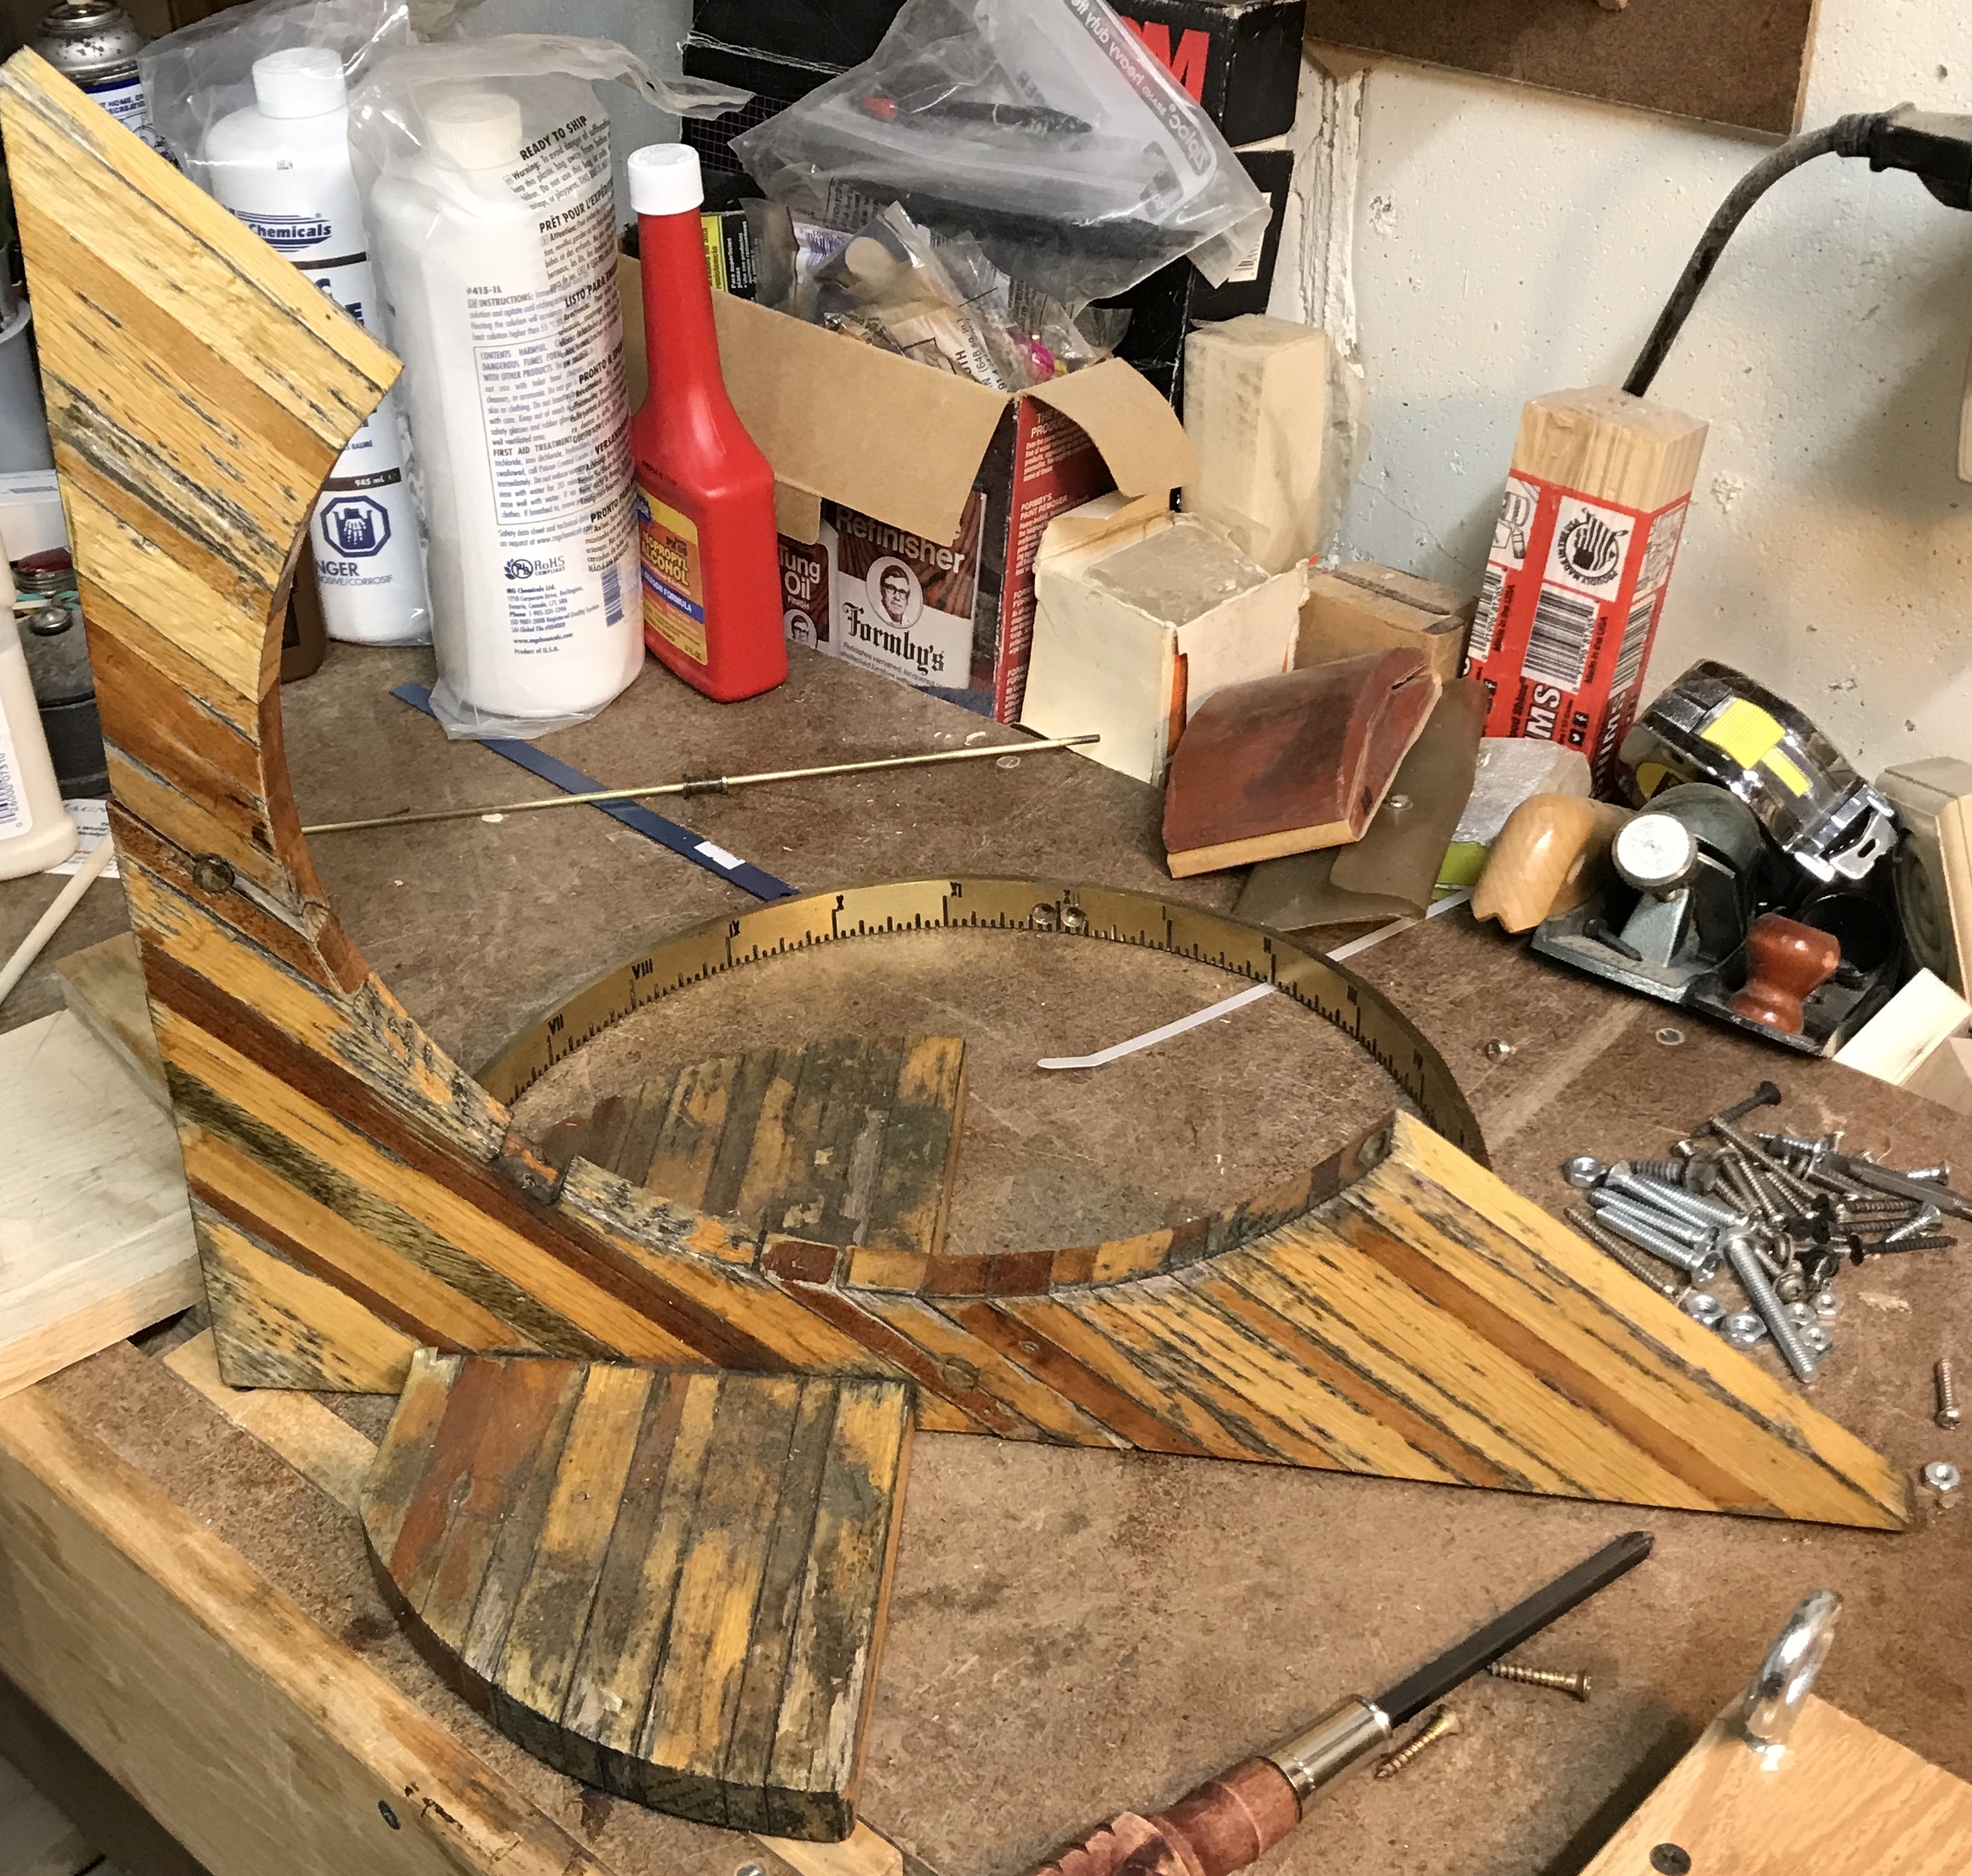
The sun clock has seen better days. Most of the spar varnish has peeled off (except for the bottom). The wood is now dirty and ugly. (Figure 1) I decided to refinish the sun clock. After removing the hour circle and the gnomon I started to remove the base. The top broke in two. This is probably the fourth or fifth time this has happened. The sun clock will be attached to the underlying concrete this time. The way I originally made it from a number of thin strips of wood was just not effective. The top and the base need to be made from scratch. I don't have teak, which would be ideal. However, I do have the walnut.
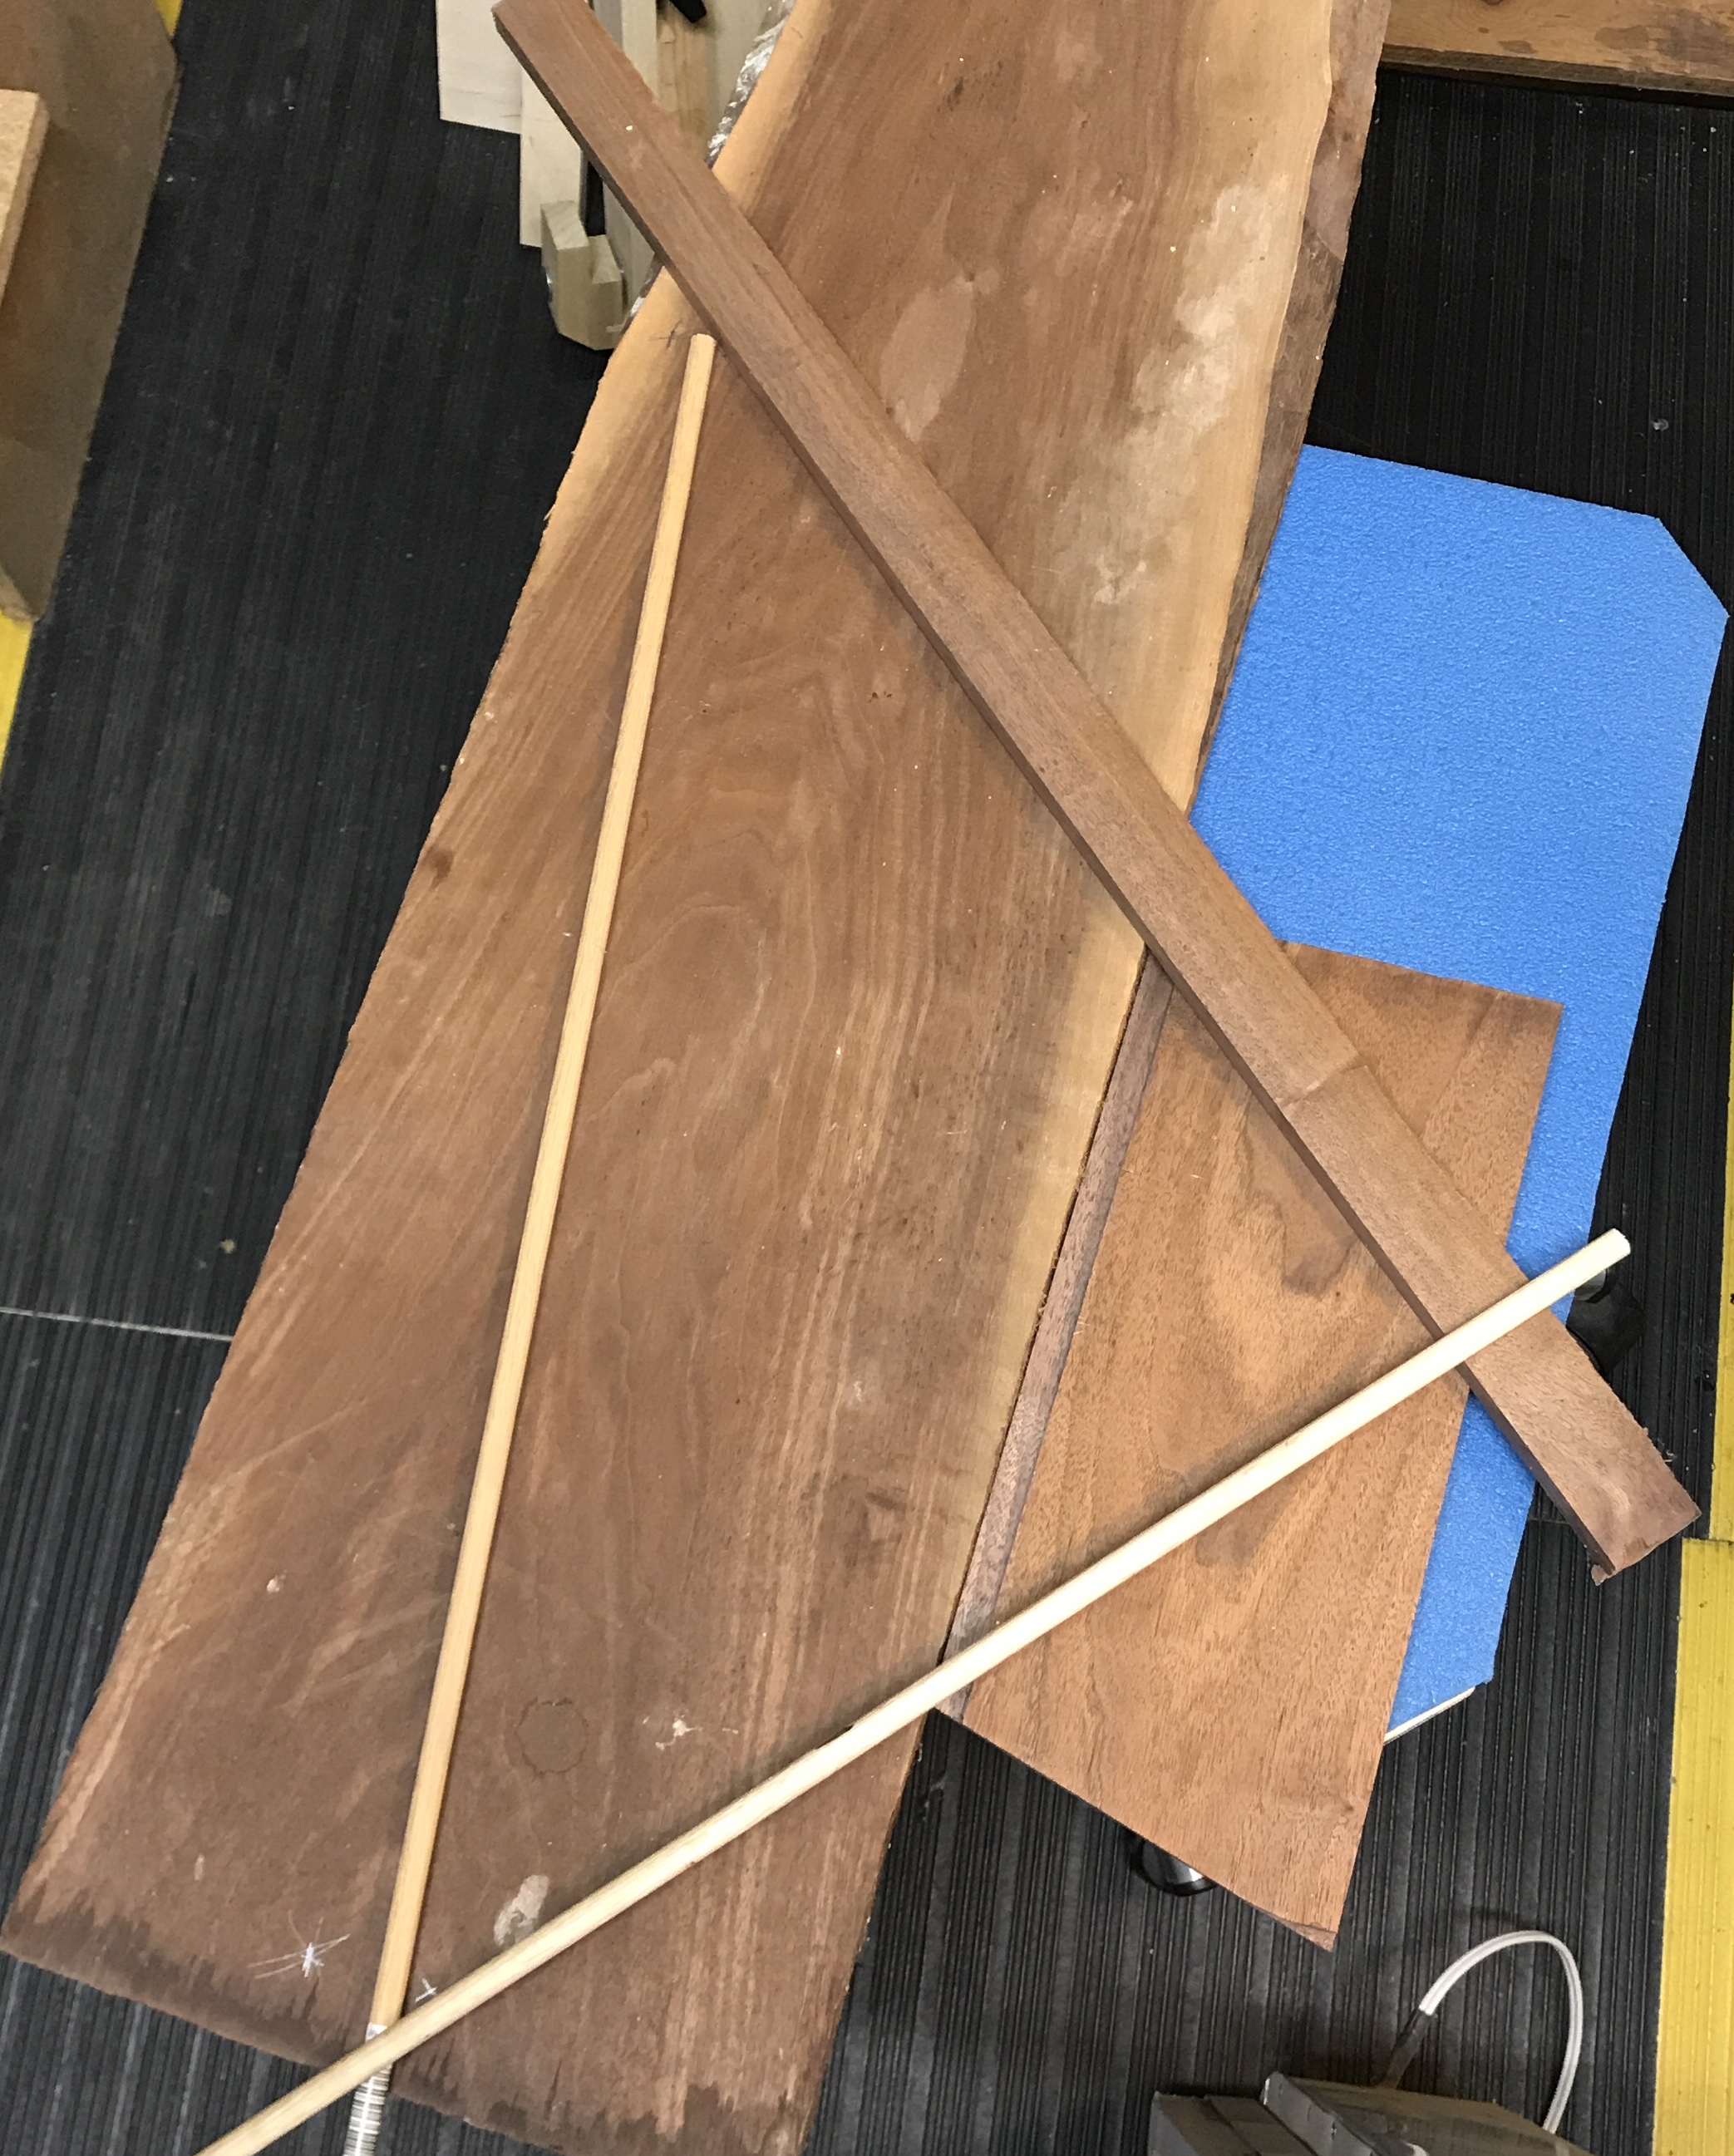
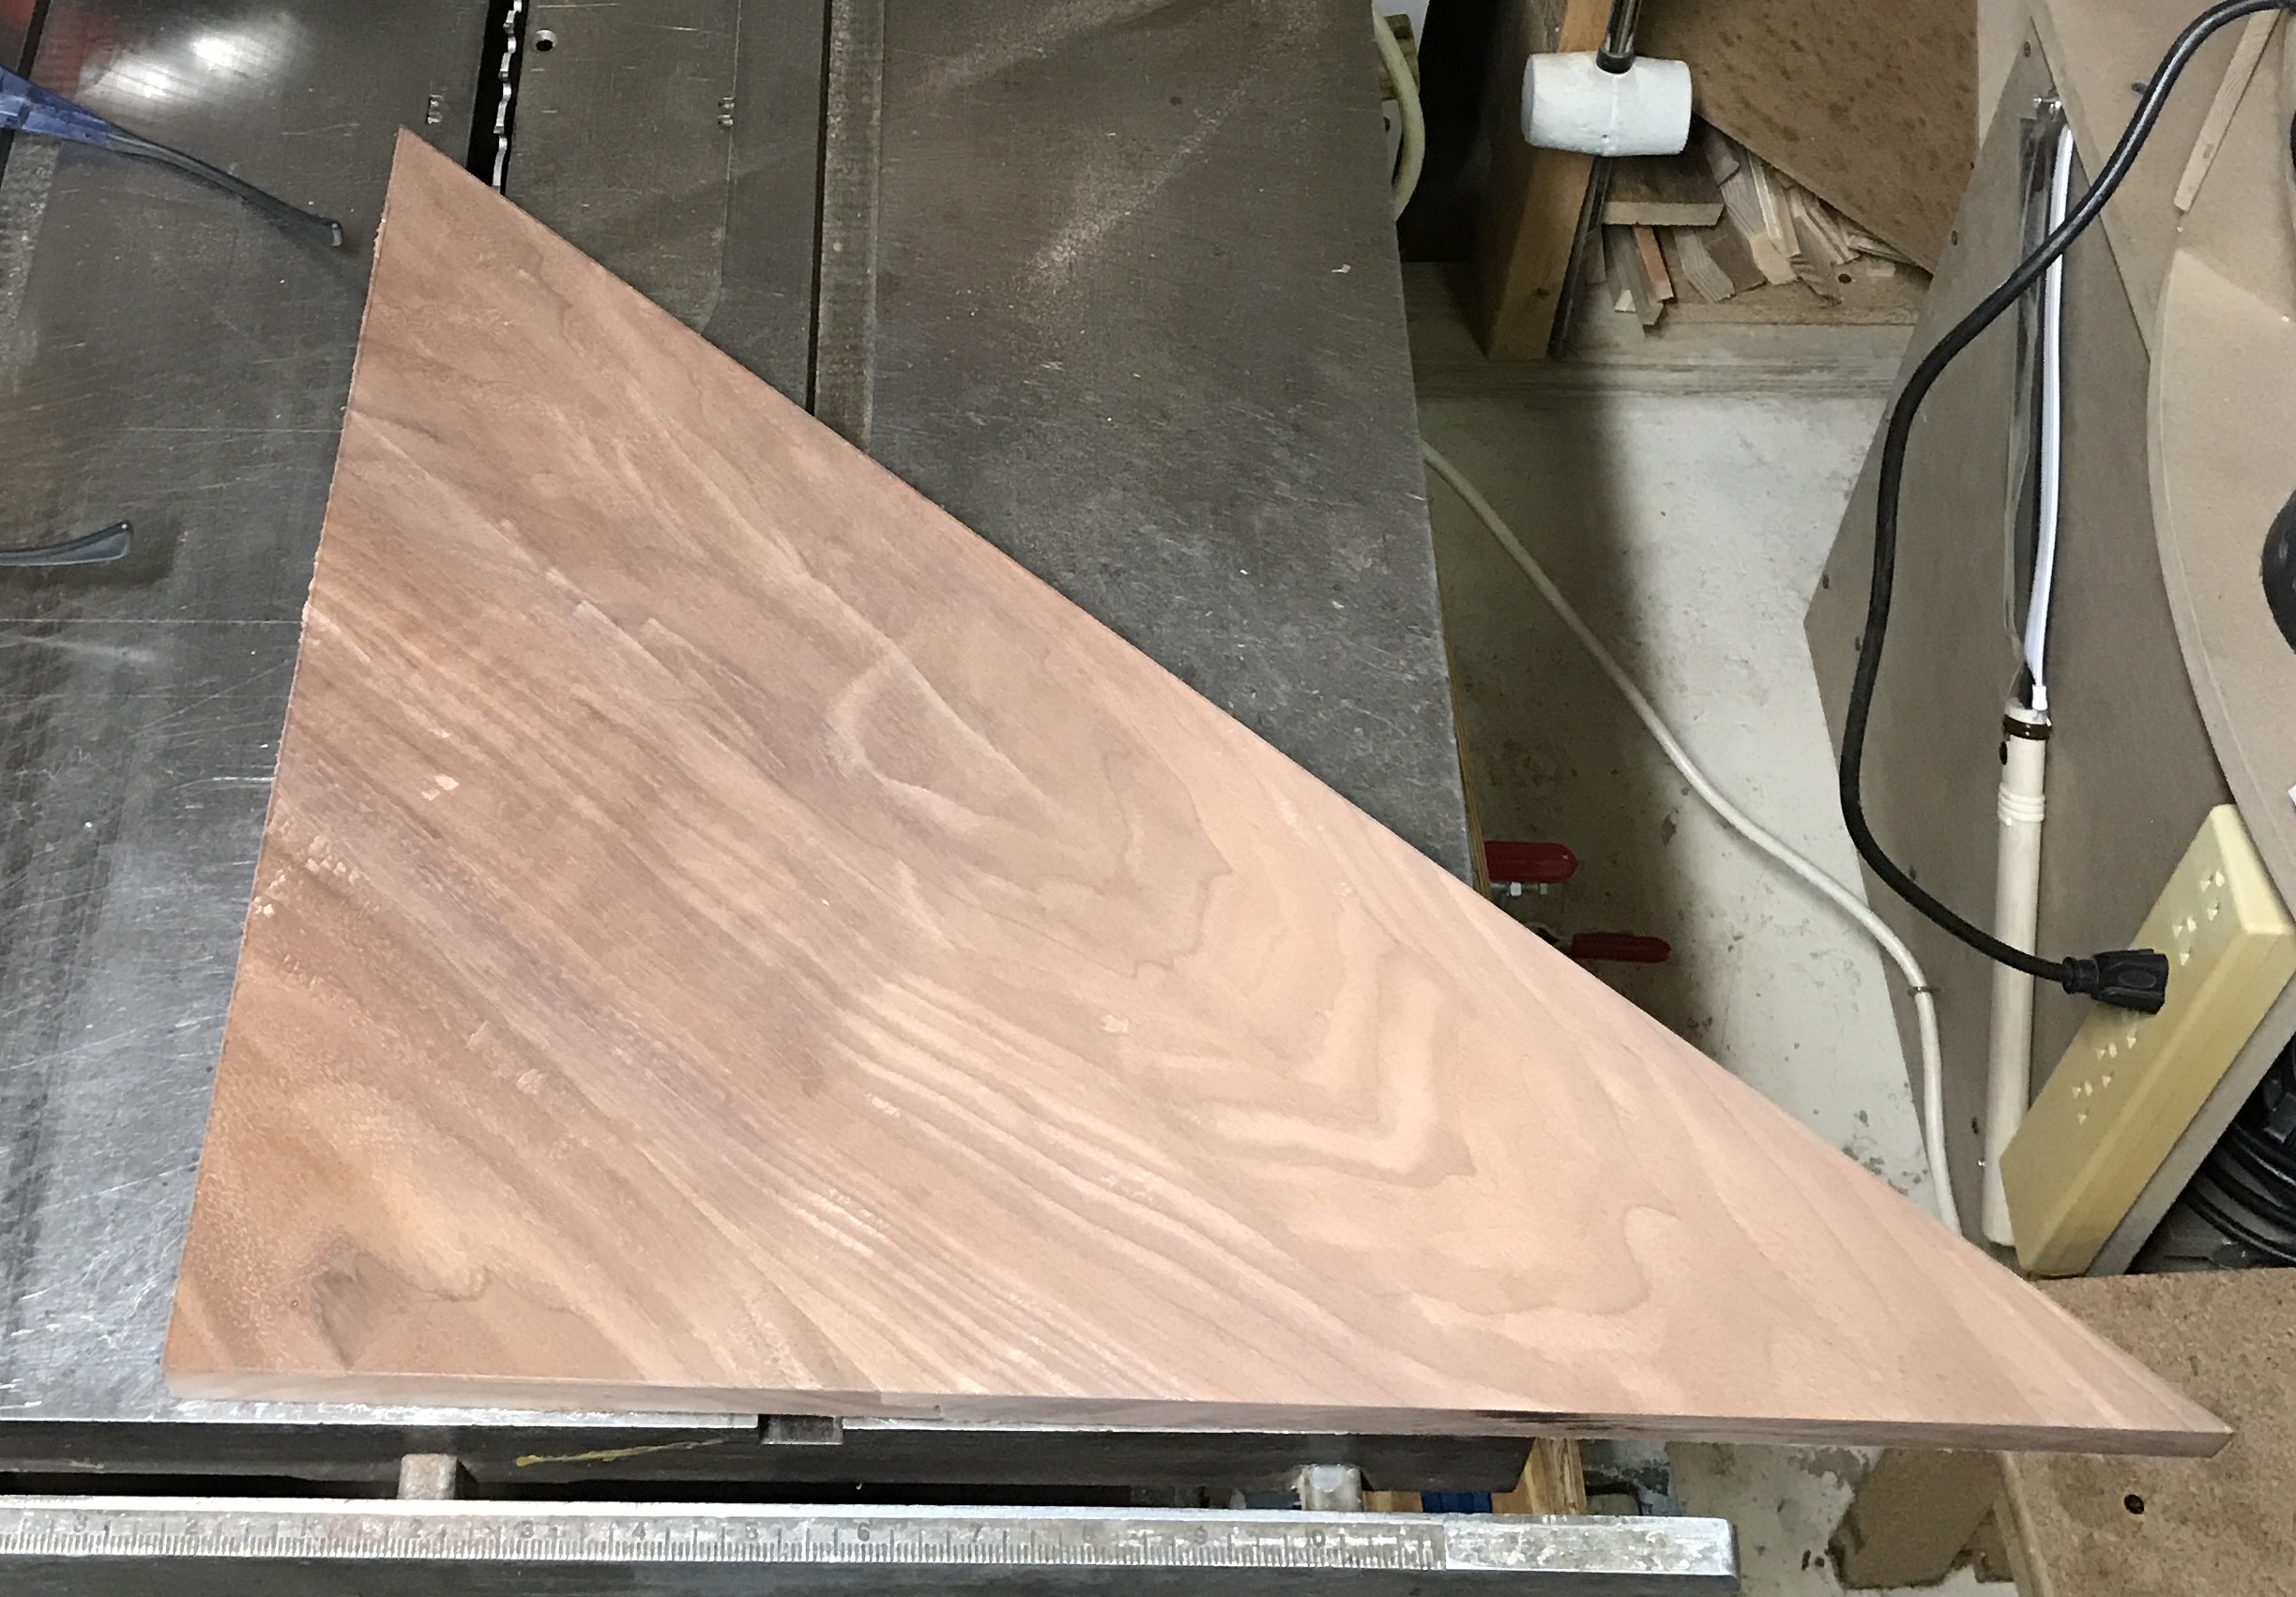
The vertical side of the sun clock is 14 7/8", while the horizontal side is 18". Consequently, the diagonal side is 23 1/2". Using a board that is this long and two shorter boards should cover the required triangle. The joints will be rabbeted and the entire triangle will be planed to a common thickness. (Doweling would be a sturdier, though more complex attachment method.) Found a wide board that should cover most of the triangle. The triangle was laid out as an approximation. (Figure 2) The marking knives with their second coat of tung oil were moved out of the wood shop so cutting could commence.
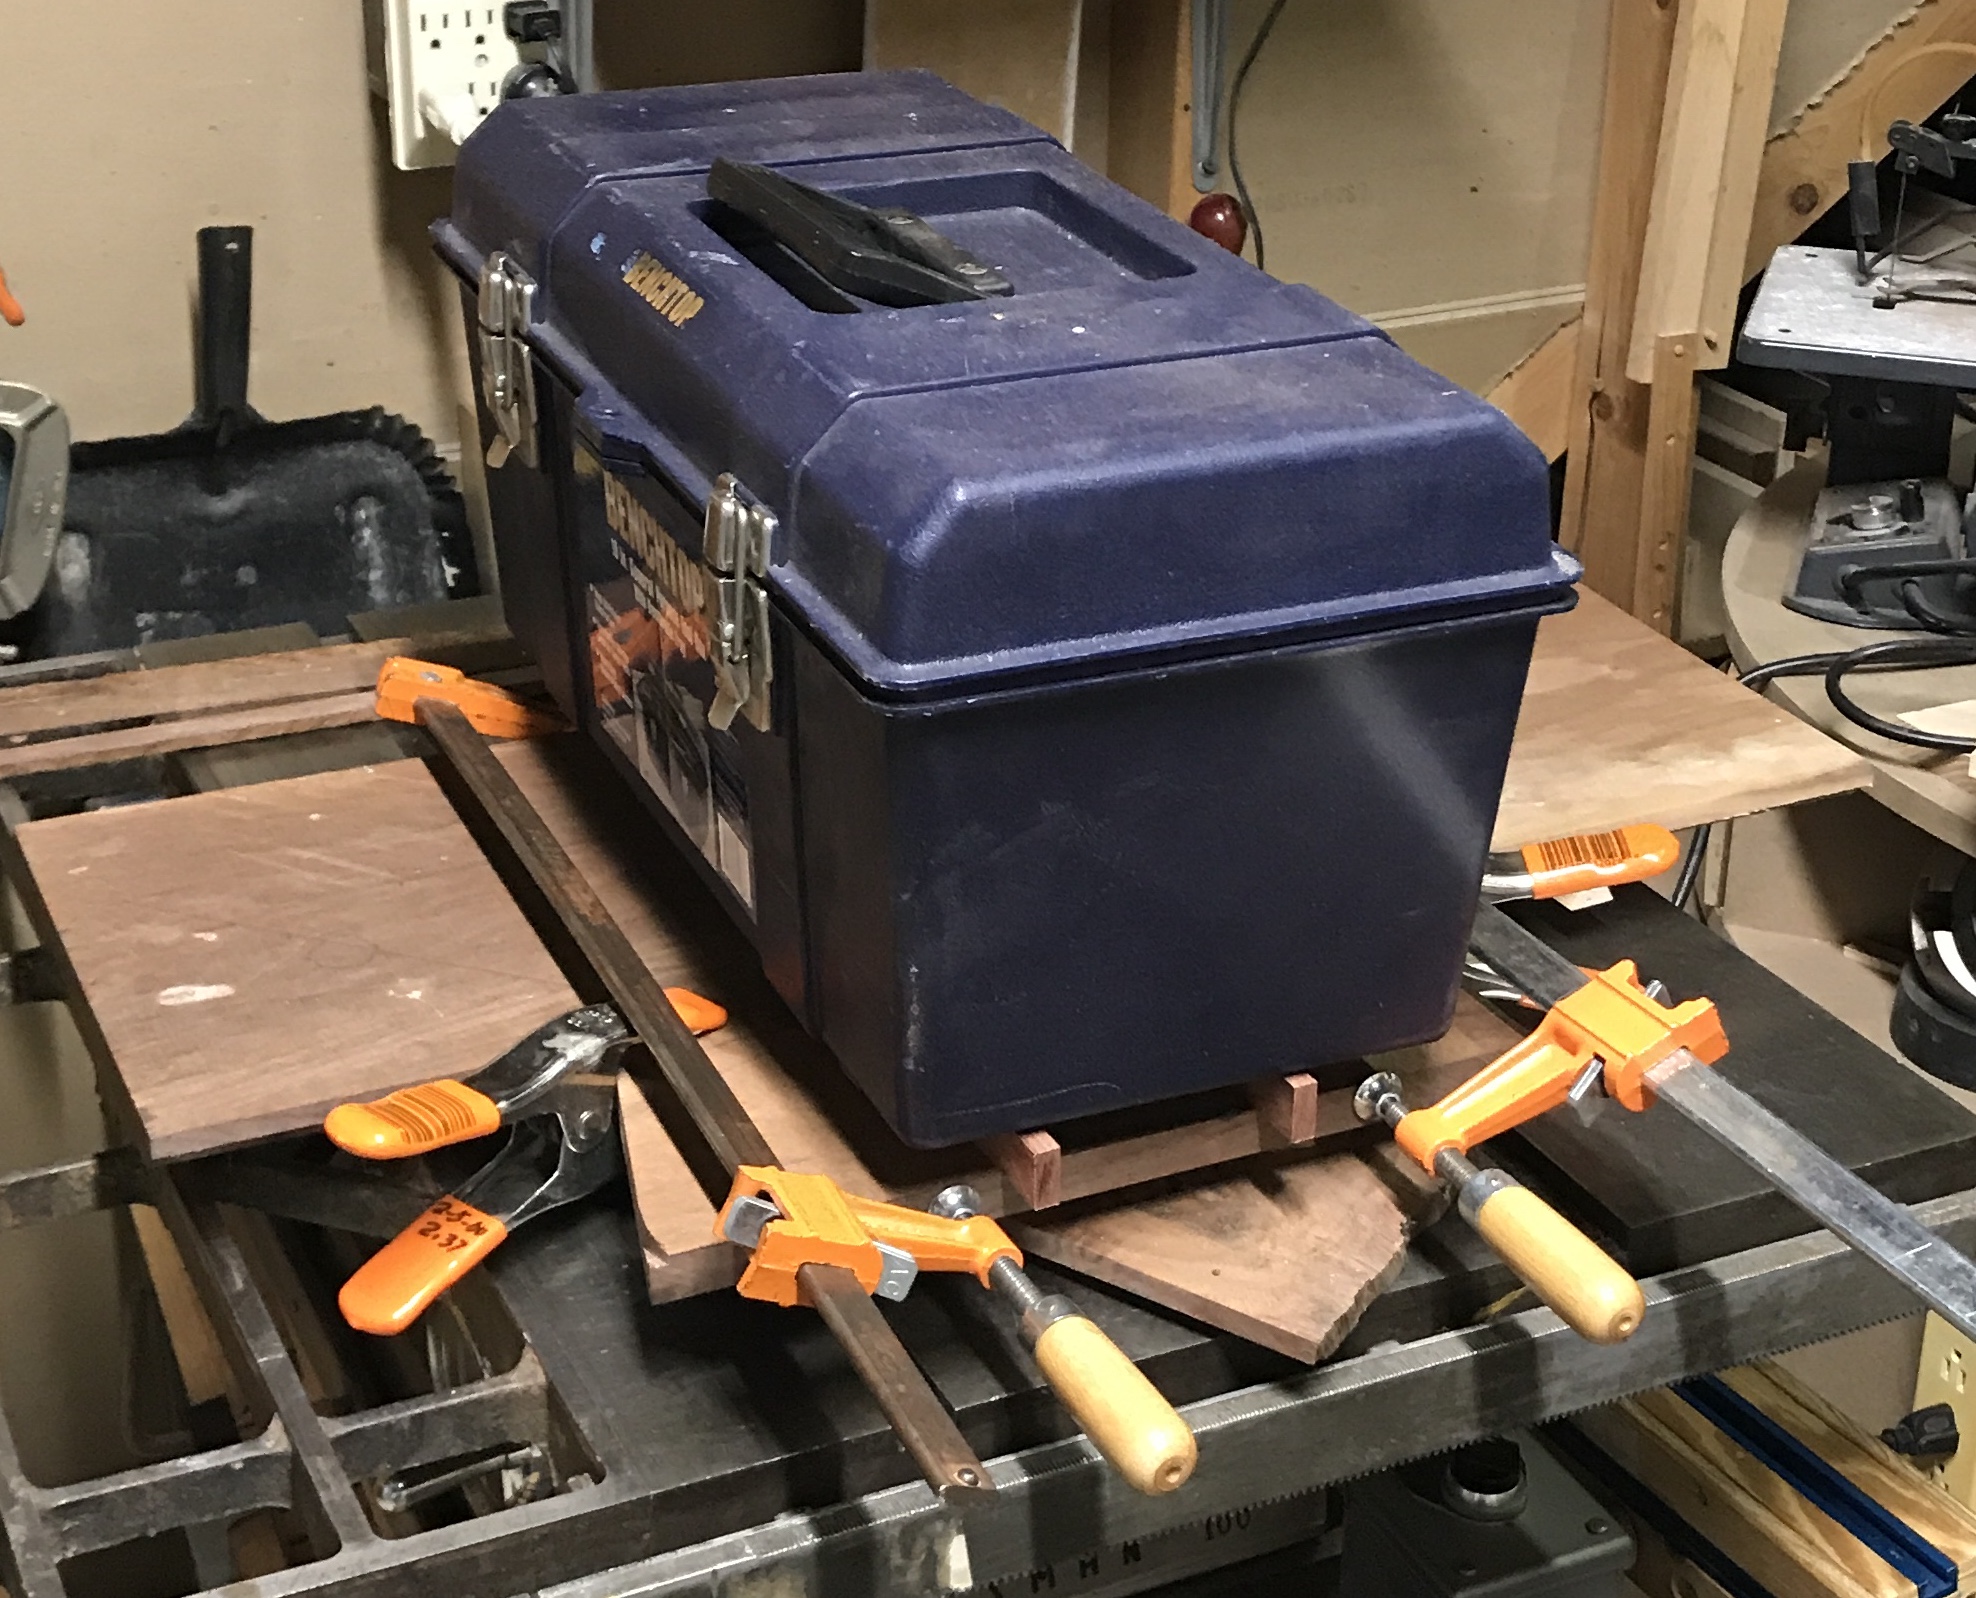
One side of the large board was rough, but reasonably straight. It was held against the fence and the other side was cut. The board was flipped and the cut side was pressed against the fence while cutting the other side. One end was removed leaving about a 26" long board. The board is only slightly warped. A rabbet was cut on one edge of the board and a matching rabbet was cut on the edge of the extra board seen in Figure 2. The small board's rabbet was trimmed 1/32" to match the width of the larger board. The triangle was laid out on the two boards (15" X 18" X 23.5"). A framing square insured the 15" and 18" sides were square. The two boards were glued and clamped. Two pinch clamps were used to keep the boards tight from top to bottom. Two bar clamps kept the boards tight across the join. Finally, the toolbox was placed across the top of the boards on parallels to eliminate bowing. (Figure 3)
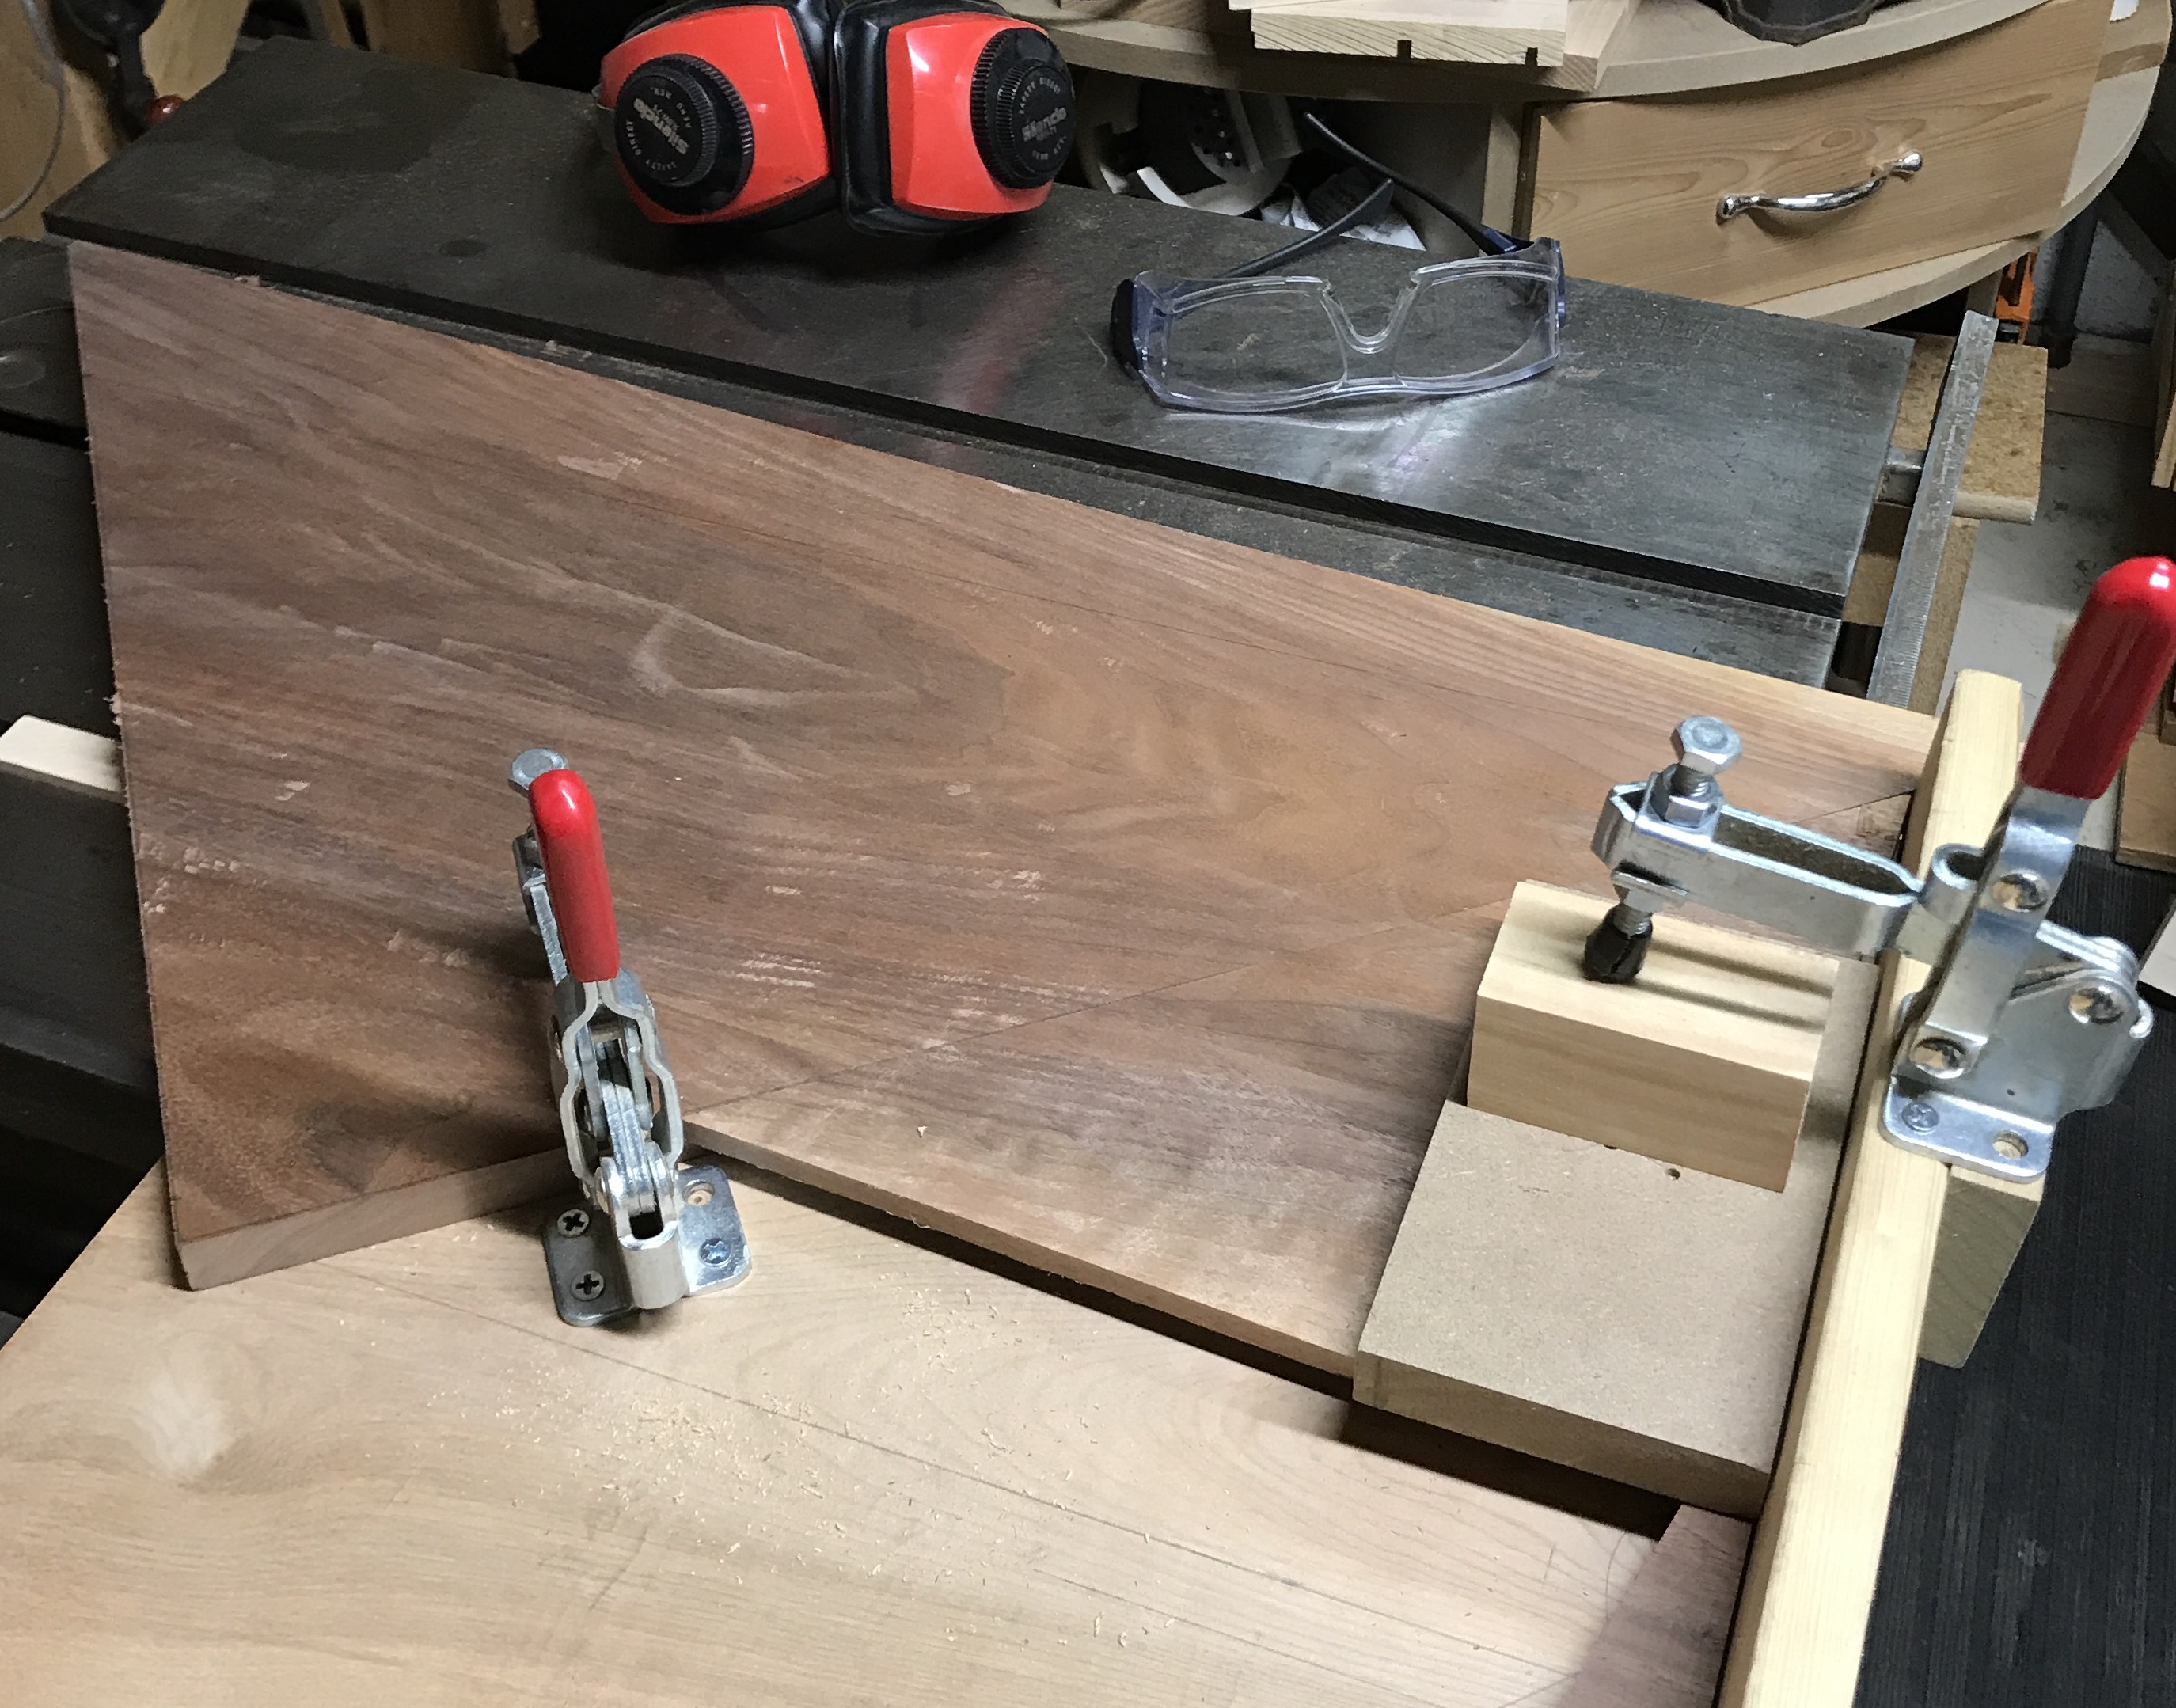
The wood was very rough. I started with a plane and this eliminated some of the bow, but I do not know how to use it to smooth stock!! Similarly, with the belt sander. After all of this I switched to sanding by hand with 100 and 150 grit paper. This produced a smooth finish, but there were multiple grooves and divots left. The dark brown walnut dust and chips were everywhere and took some time to vacuum. Figure 4 shows the resulting board. The many deep sawing grooves in the upper left will not be part of the eventual triangle cut from this stock.

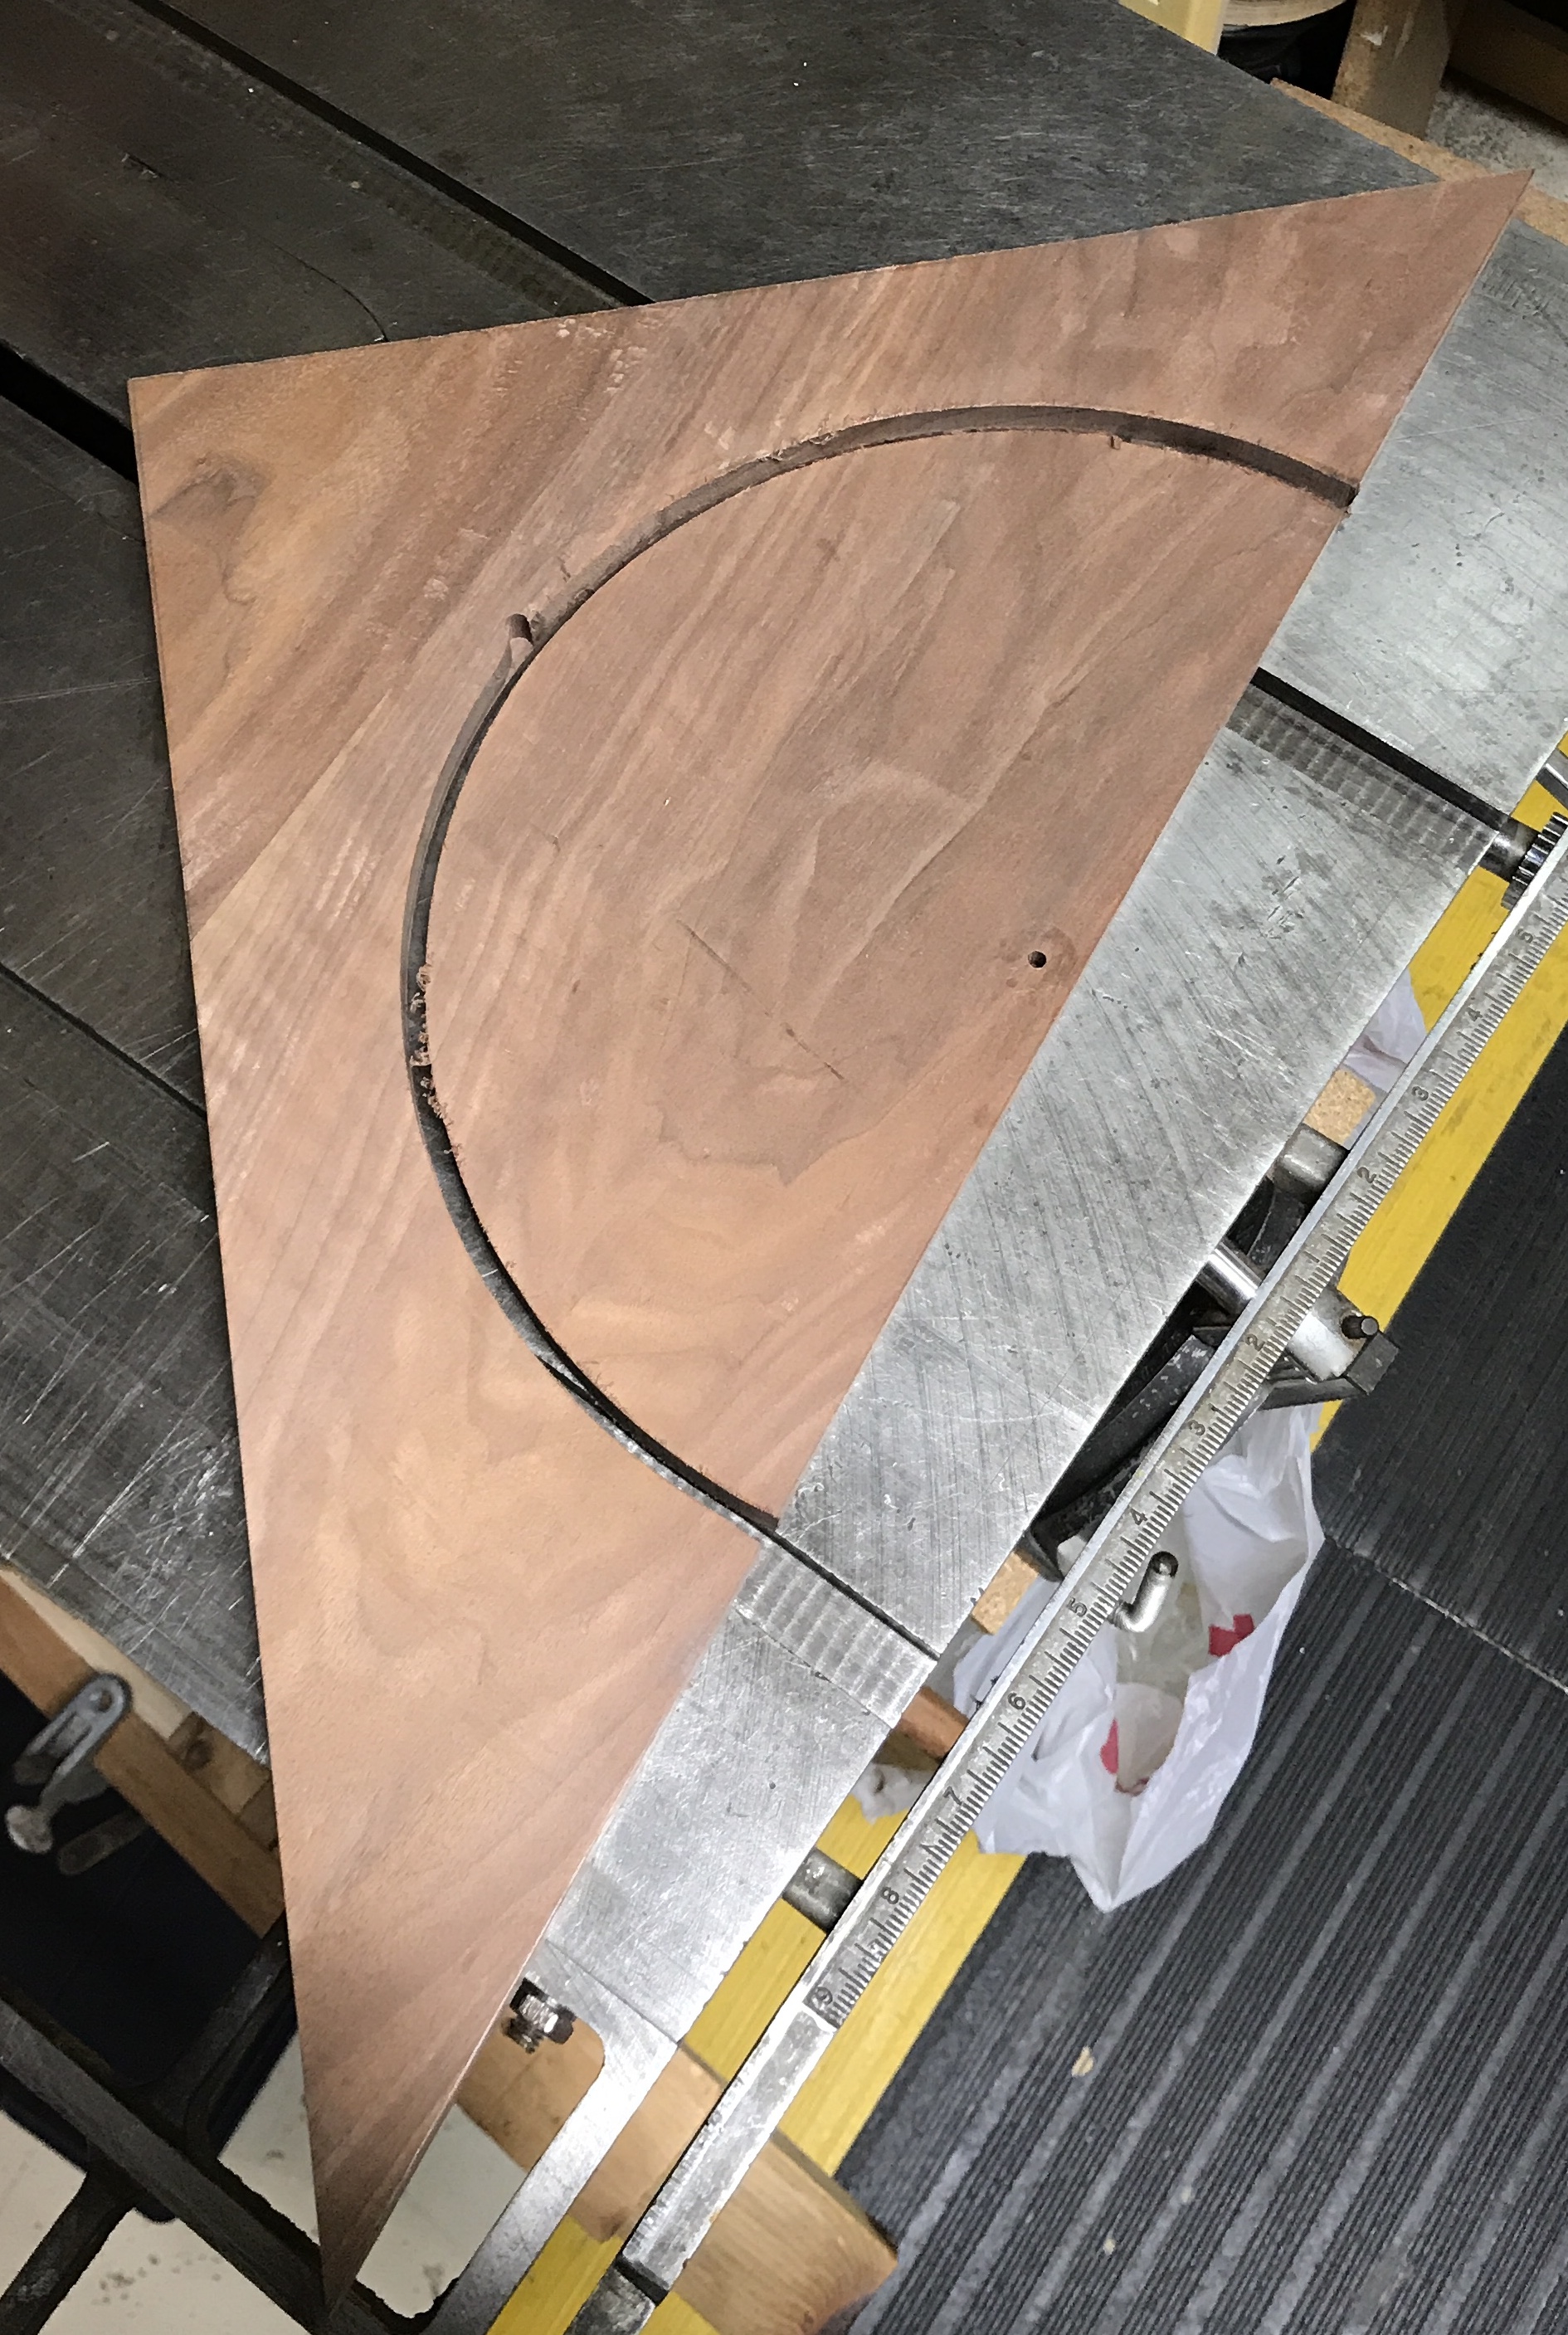
The triangle was to be cut from this blank. The triangle was laid out according to the dimensions above using a framer's square. The first cut was the 18" long side. It was simply held on the crosscut sled with the line aligned with the miter slot. An 11/64" drill was used to hold the blank at the correct orientation. The 15" side was easy as it makes a right angle with the 18" side. The final side needed a lot of support as it had to be oriented with a point facing the back of the crosscut sled. Clamps and angle blocks set it up for a near perfect cut along the line. (Figure 5) The resulting walnut triangle is shown in Figure 6.
The first attempt to cut out the hemicircle with the jjig saw was not successful. The plan was to adapt the router circle cutting jig to the jig saw. Two of the holes for attaching the jig to the router were well placed for clamping the jig saw. Two strap clamps were made by drilling through holes in short lengths of 1/8" X 1/2" steel. Putting some long 10-24 screws in the jig's holes and the straps and some wooden blocks at the back ends held the jig saw tightly. Unfortunately, the jig plus jig saw was too large to allow clamping the triangle to the table on blocks.
The second attempt will use the built-in cutting guide holder on the jig saw. This is essentially two slots in the base for inserting a metal bar that would normally hold a fence. If a bar with a hole is used instead, it may serve as a circle cutting jig. I happened to have a cut off of walnut that is about 1/8" thick and 13/32" wide. It fits perfectly through the slots. After getting the clamping right and adjusting the circle cutting arrangement a cut was taken. It was not successful! The flexibility of the bar was too great and the cuts wandered into the circle.
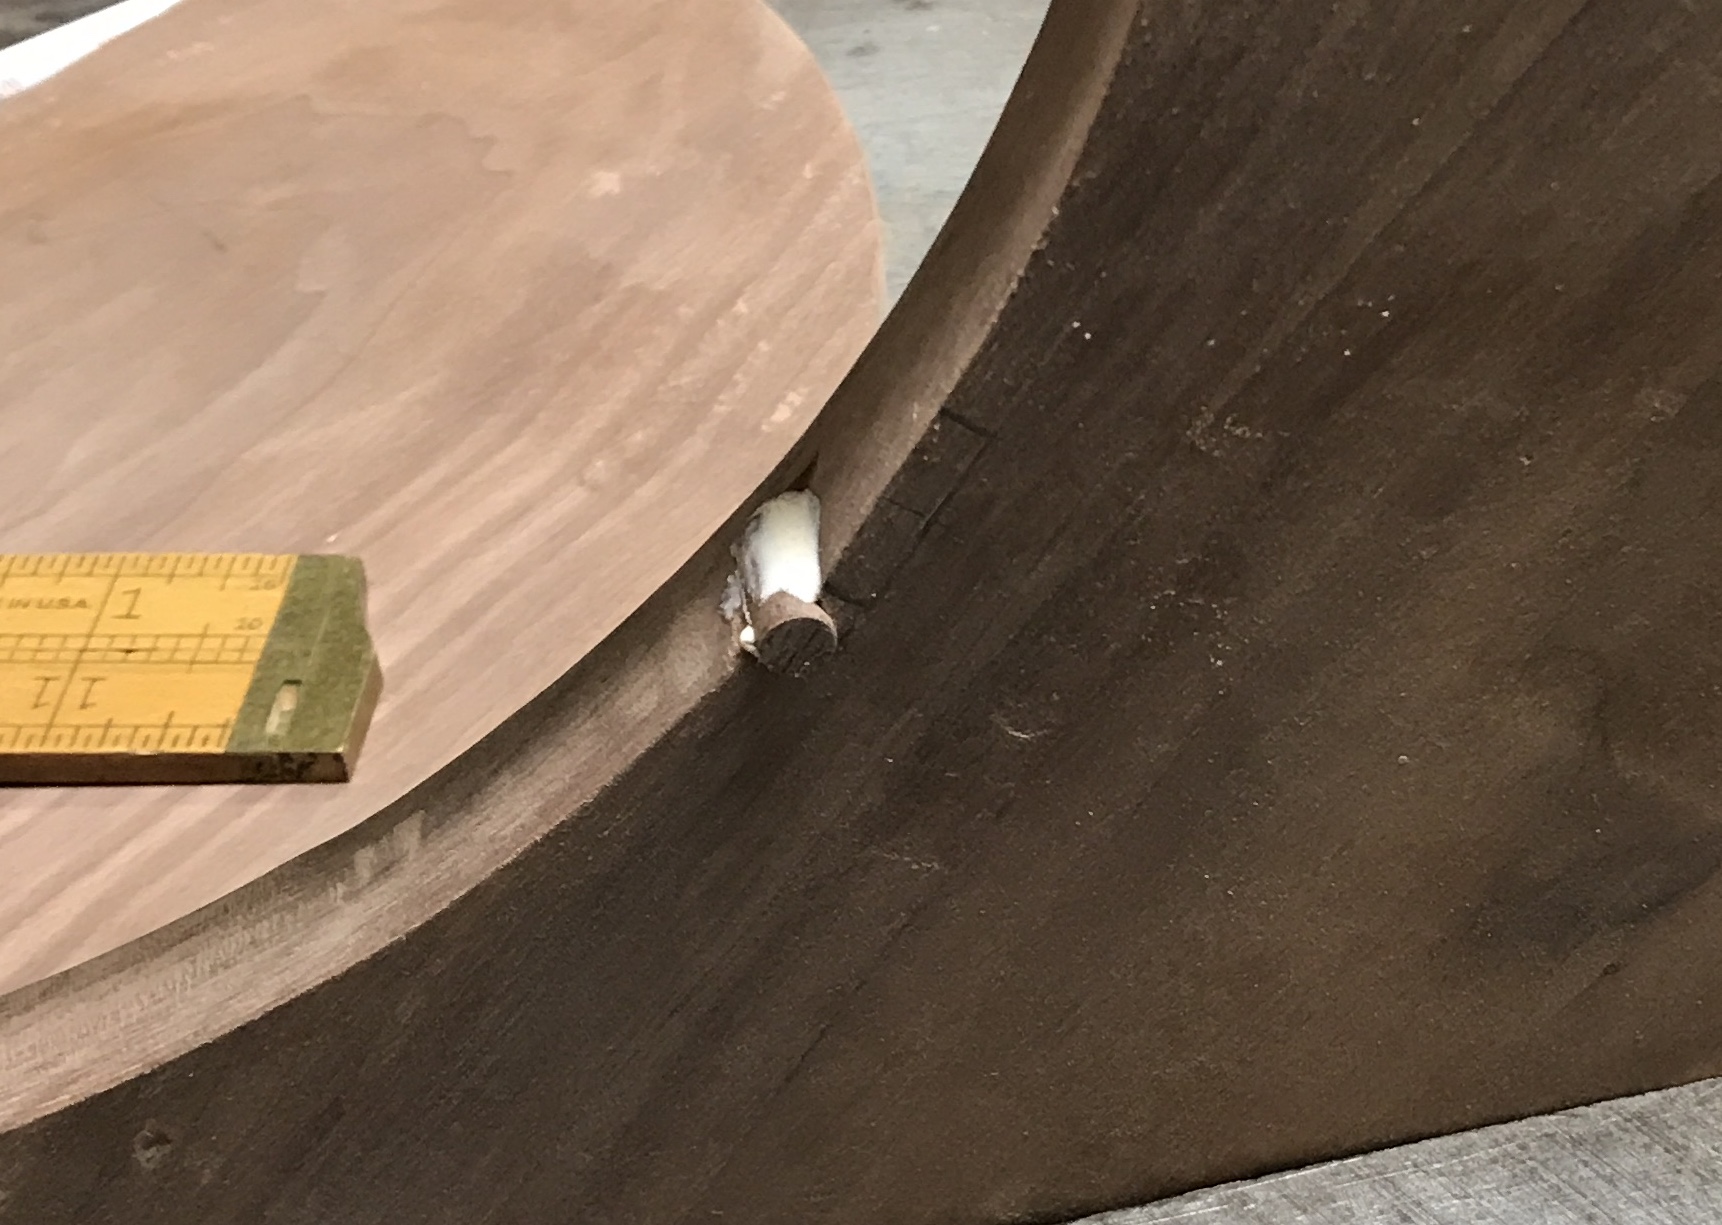
Got back to the sun clock today. Went back to the router. Two boards were marked with the edges of the triangle and then clamped to the table saw. The triangle was held onto these boards with carpet tape. Very solid! The old Craftsman router with a 1/4" bit was attached to the circle cutting jig. The cut was made in three 1/4" deep passes. During the second cut the peg jumped out of the hole leading to a 1/4" "dig" in the side of the body. It looks like this may be where the dado for the brass will be cut. The router bit distance was set so the errant cuts from the jig saw were removed. The router cut through the wood very easily. Some sanding will be needed to clean up both parts seen in Figure 7.
The frame and base were sanded this morning. A drum sander was fitted with 120 grit paper and used to sand the inside of the frame hole and the outside of the semi-circle. Both parts were then given a good going over with a sanding pad with 150 grit paper. All edges were lightly chamfered. The dado for the brass hour circle was laid out at 40° from vertical. It was marked 3/4" wide and 3/16" deep. It did not overlap the router mistake. Consequently, a 1/4" walnut dowel was made on the lathe. It was cut to size and fit well in the router bit hole. It was glued into place as seen in Figure 8 (along with the marked out dado just above the plug).
The base was marked on center and this was aligned with the dado blades in the table saw. The dado was a fraction over 5/8" wide. The base was held with the miter and the dado cut to 5/16" deep. Two through holes were drilled in the base for the screws. These holes were transfered to the frame with a punch. They were then drilled for two brass screws found in the supply. The dado was cut with care by hand and two holes marked for the brass hour circle. These were drilled carefully, but one is very close to the side. Decided to plug these holes and try again.
The plugged holes needed a 0.150" dowels, so I made two on the lathe. One was parted off at 3/4" and the other at 5/8". Both were tight fits and were glued into the holes. The ends were filed off and the surrounding dado cleaned up with sandpaper. Two new holes were drilled after careful measurements and marking. The hour circle fits nicely, though there is a 1/16" gap at the top of the dado.
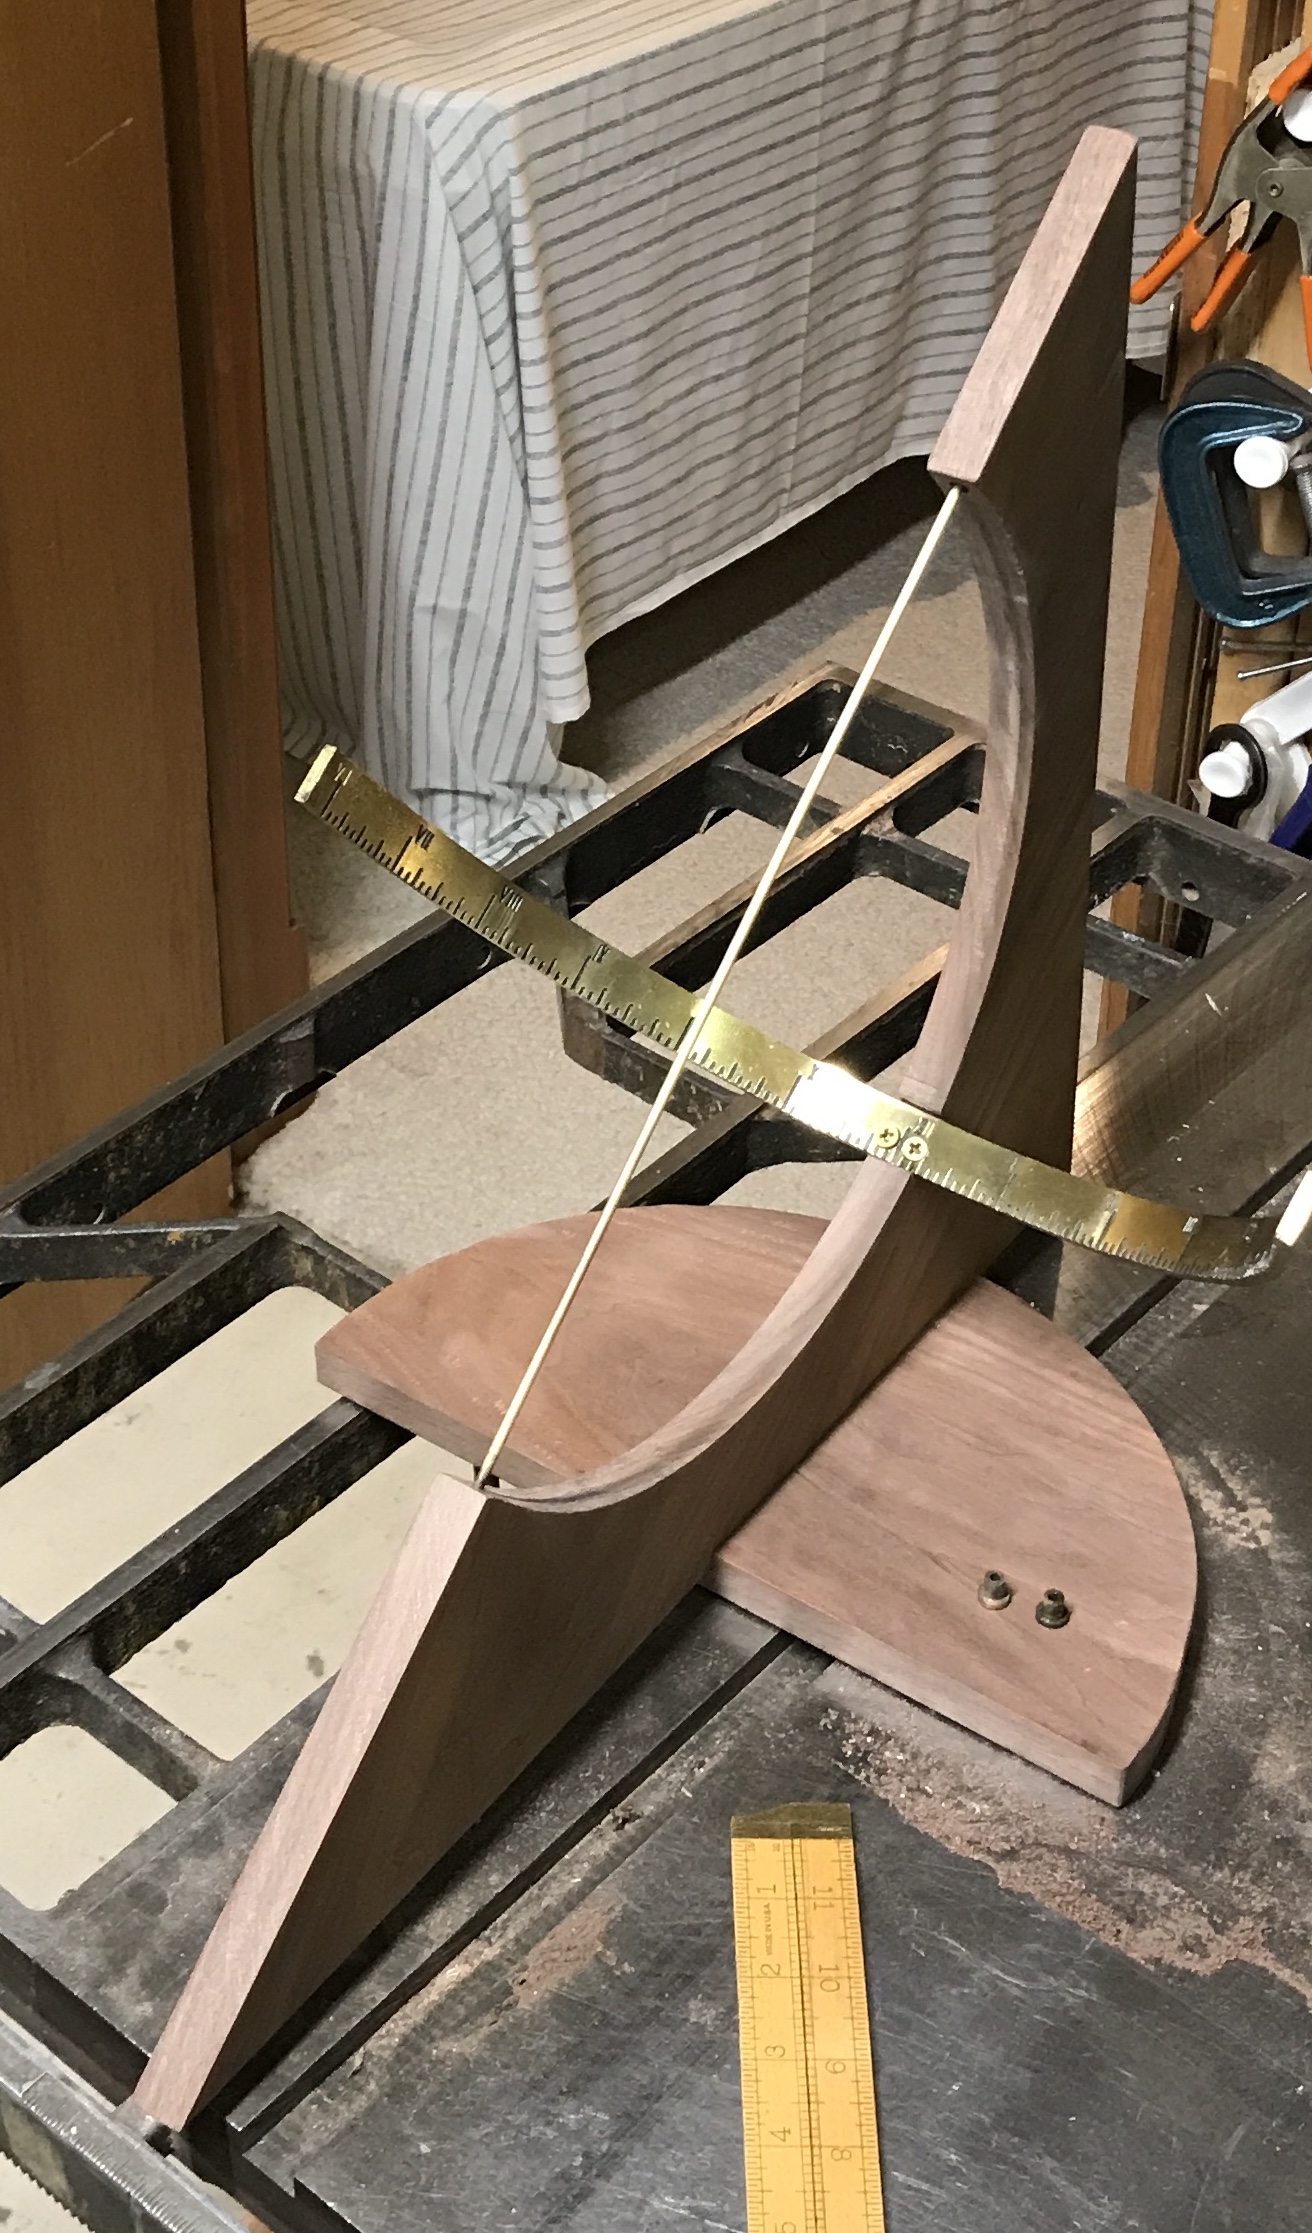
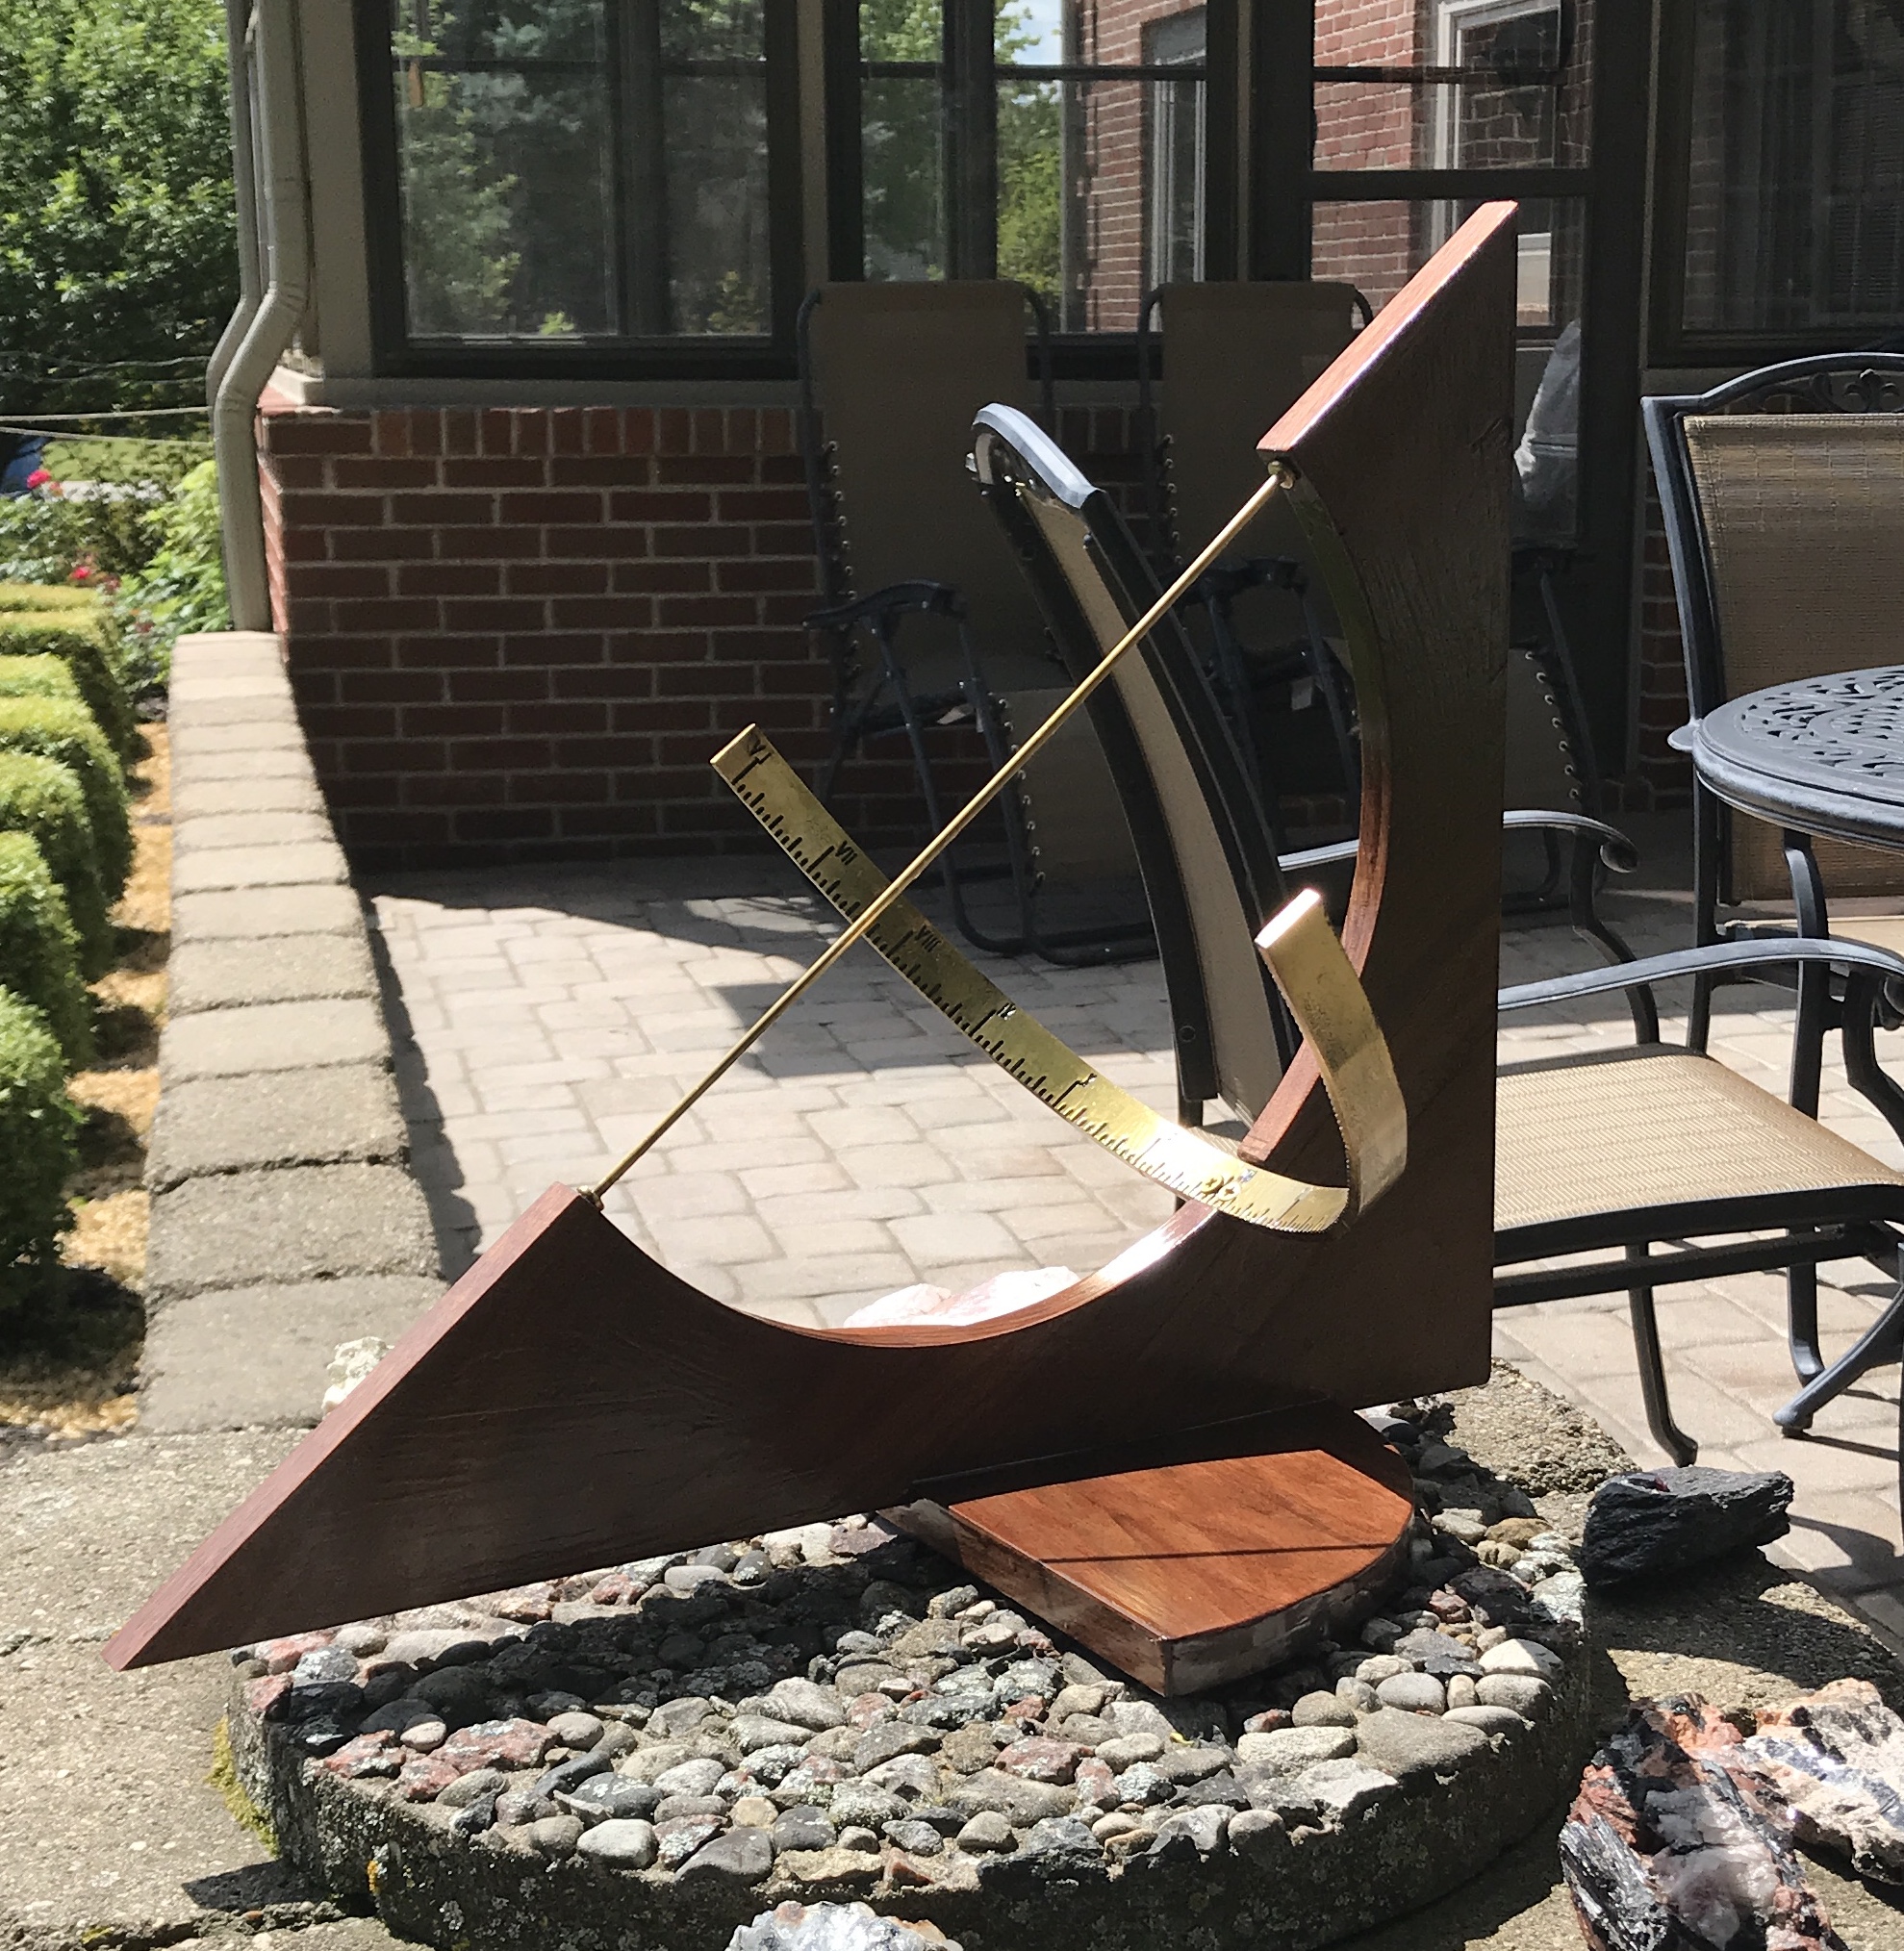
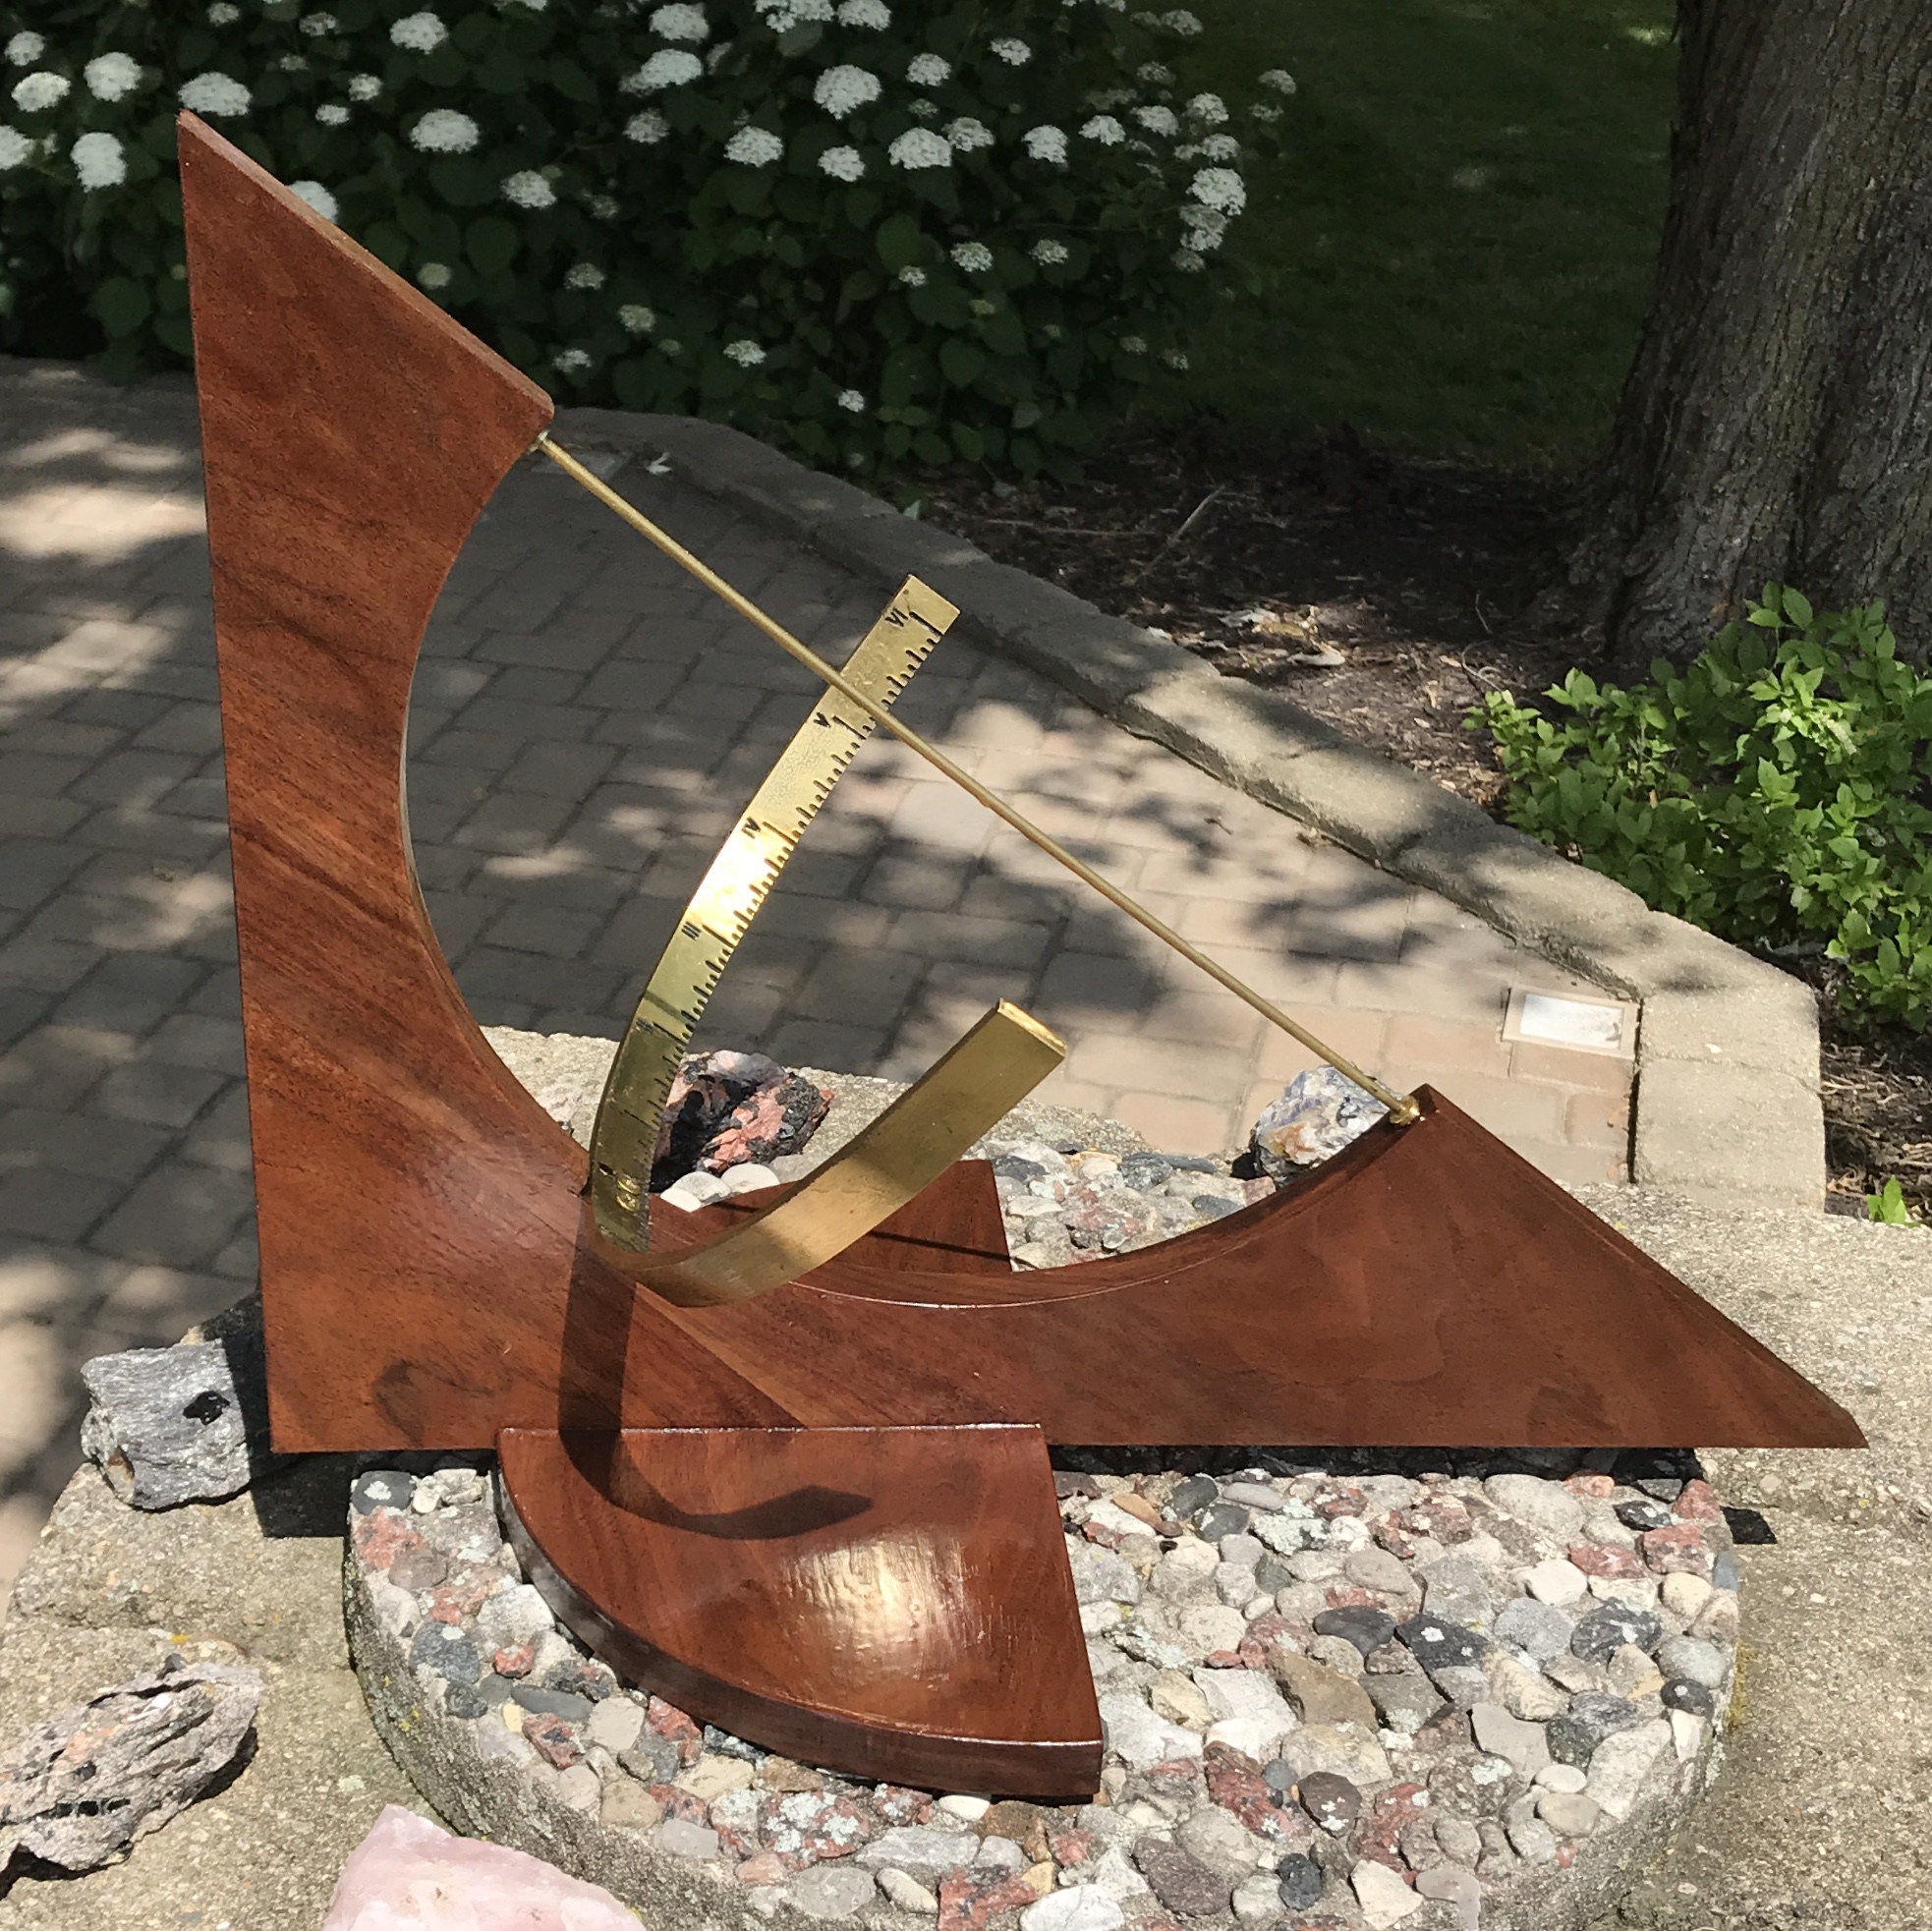
Next is drilling for the gnomon. The gnomon is 1/8" in diameter and the grommets are 0.256" in diameter. The bottom hole should be 1/4" deep, just enough for the grommet. The top hole needs to be 1" deep. This allows easy installation of the gnomon and yet during normal use it is secure. The hand drill is too long to fit in the circular opening, so I pulled out the cordless drill. Both batteries are completely dead!! After an hour of battery charging I charged forth. The hole locations were marked and punched. The holes were drilled 1/8" to the appropriate depths. The usual 1/4" drill was too long, but I found a stubby version and used this to countersink both holes to a depth of 1/4". The entire sun clock was assembled except for the grommets as seen in Figure 9. The grommets need to be driven in or the holes enlarged a bit.
I am not quite sure how best to finish the sun clock. The only finish listed on the can of spar varnish is Minwax wood finish. I do not want to stain the walnut. I sprayed the spar varnish on a piece of sanded scrap to see how it looks without any other finish. Three coats are recommended and need to be applied with two hours. It is pretty humid, so I will wait an hour between coats. The scrap of walnut looks fine with only the spar varnish, so spar varnish will be the finish.
Assembled the sun clock after a little grommet polishing. The gnomon was also lightly sanded. The grommets had to be pounded into the holes with the new brass faced hammer. A few of the Roman numerals needed to be re-blackened. This was done with the gel nail polish purchased for the orrery. The nail polish was brushed on and after a minute was wiped off. This did a reasonable job of removing only the polish outside the numeral. The first coat of spar varnish was then applied with a brush. It was applied to the wood and to all of the brass parts. The base's bottom will be brushed when the top has dried. The varnish was applied two more times with light sanding (220 grit) between coats. It is very wavy from the brush strokes and from the effects of gravity. On the other hand spraying left a "bumpy" finish.
Two coats of varnish were applied to the bottom today. A third tomorrow should complete the sun clock. The only remaining task is figuring out a way to anchor it in place. The wind was responsible for most of the breakage of the previous iteration.
It is never done until it is done!! I would like to have the Equation of Time displayed on the sun clock. The Equation of Time gives the minutes that the sun clock differs from the local time (after correcting for longitude and DST). This variation is from about -15 minutes to +15 minutes depending on the time of the year. I found a website that had the equation as well as a reasonable explanation. This information has been collected into this web page. The idea is to graph the Equation of Time and then use the graph to etch a piece of brass. The brass would then be affixed to the base of the sun clock for ready reference. Unfortunately, I am having problems with the graphing package Plotly.js. With luck a question posted to their user group will provide a needed fix.